Reaper is an innovative new, open-source proxy created by Ghost Labs that uses a drag-and-drop workflow system to easily create and share automated workflows. This blog will walk you through the installation process, how to complete common BurpSuite tasks within Reaper, and introduces some fuzzing techniques.
If you haven't already downloaded Reaper, get it now on GitHub: https://github.com/ghostsecurity/reaper
Installing Reaper
- Make sure that
~/go/binis in PATH git clone <https://github.com/ghostsecurity/reaper.git>cd reaper& runmake wails- Install dependencies:
apt-get install build-essential npm libgtk-3-dev libwebkit2gtk-4.0-devorbrew install npm make install- Reaper will be in
build/bin. Add it to path! Launch withreaper
👇Installer script👇
👆Installer script 👆
Migrating from BurpSuite
Below I want to outline how to do common tasks you’d often do in BurpSuite but in Reaper.
- Setting up the project scope, accessing the certificate
- Intercepting and modifying a request
- Replaying a request via repeater
- Fuzzing with intruder
Setting up the Project & Accessing the Certificate
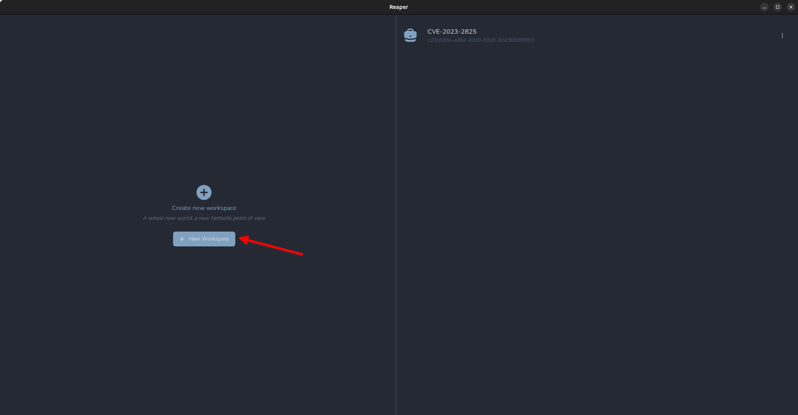
BurpSuite uses project files, in Reaper we use workspaces. Conveniently they are displayed in the main window when first opening Reaper. To access an existing workspace we can click on it in the right pane, or we can create a new one. We’re going to click “Create a new workspace”
On the next screen, we can set scoping options for our connection. This way we can avoid noisy background browser requests like captive portal checks and requests to ad services appearing in our log. We can always adjust the scope later, but for now, let's enter the domain icanhazip.com, and include subdomains and click “create”.
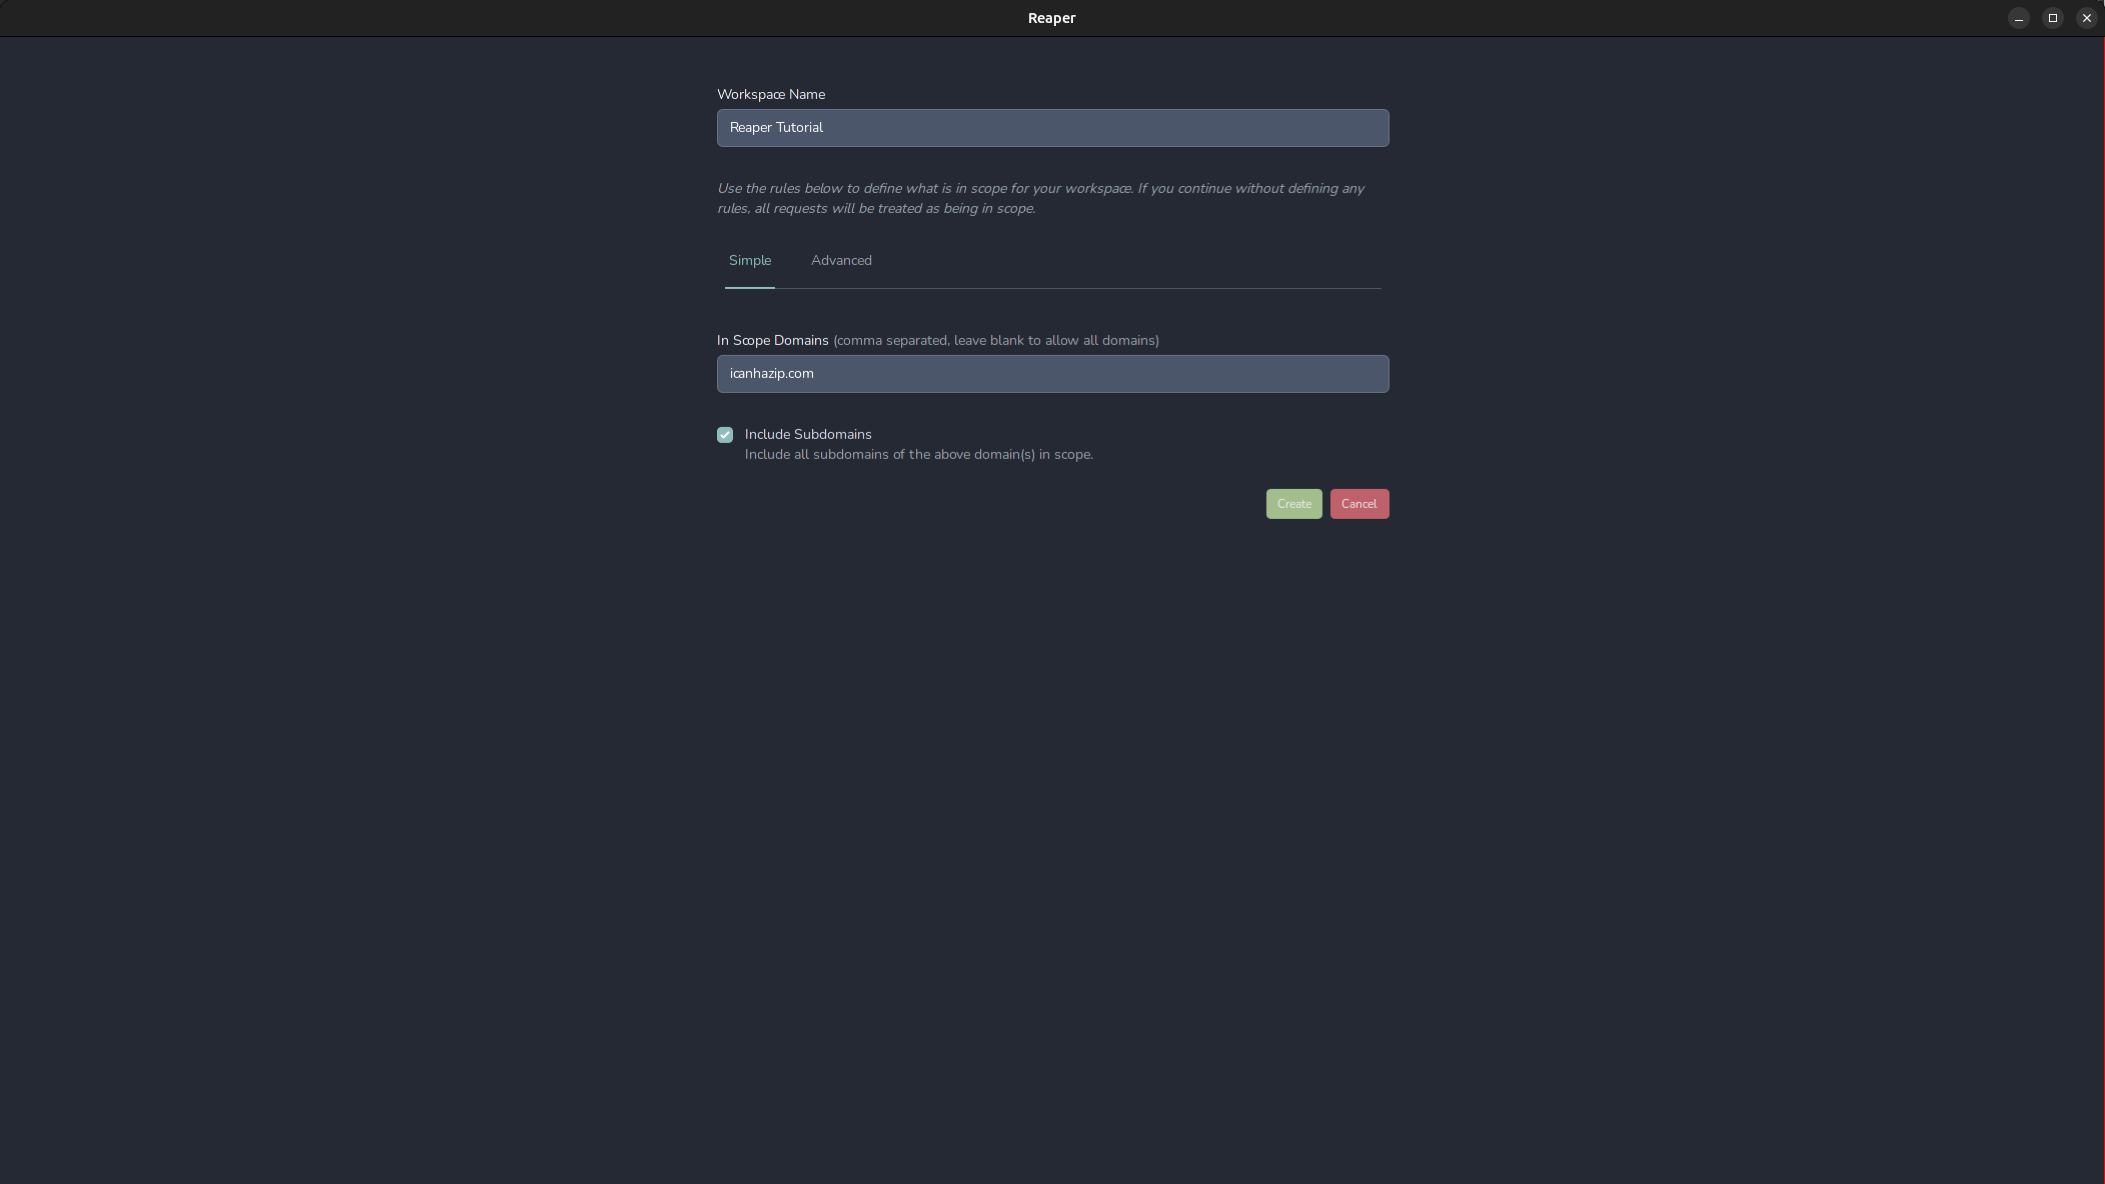
The advanced section lets us set more specific rules about what protocols, ports, and hosts we want to include or specifically exclude from our scope. The scope is stored in the workspace’s settings configuration, which is the briefcase icon in the bottom left. If we need access to proxy-specific options, click the gear in the bottom left. For example, if we want to change the port our proxy is listening on, we can do so in this menu. More importantly, if we need to export the proxy’s certificate to import into our system trust or Firefox, it can be done here.
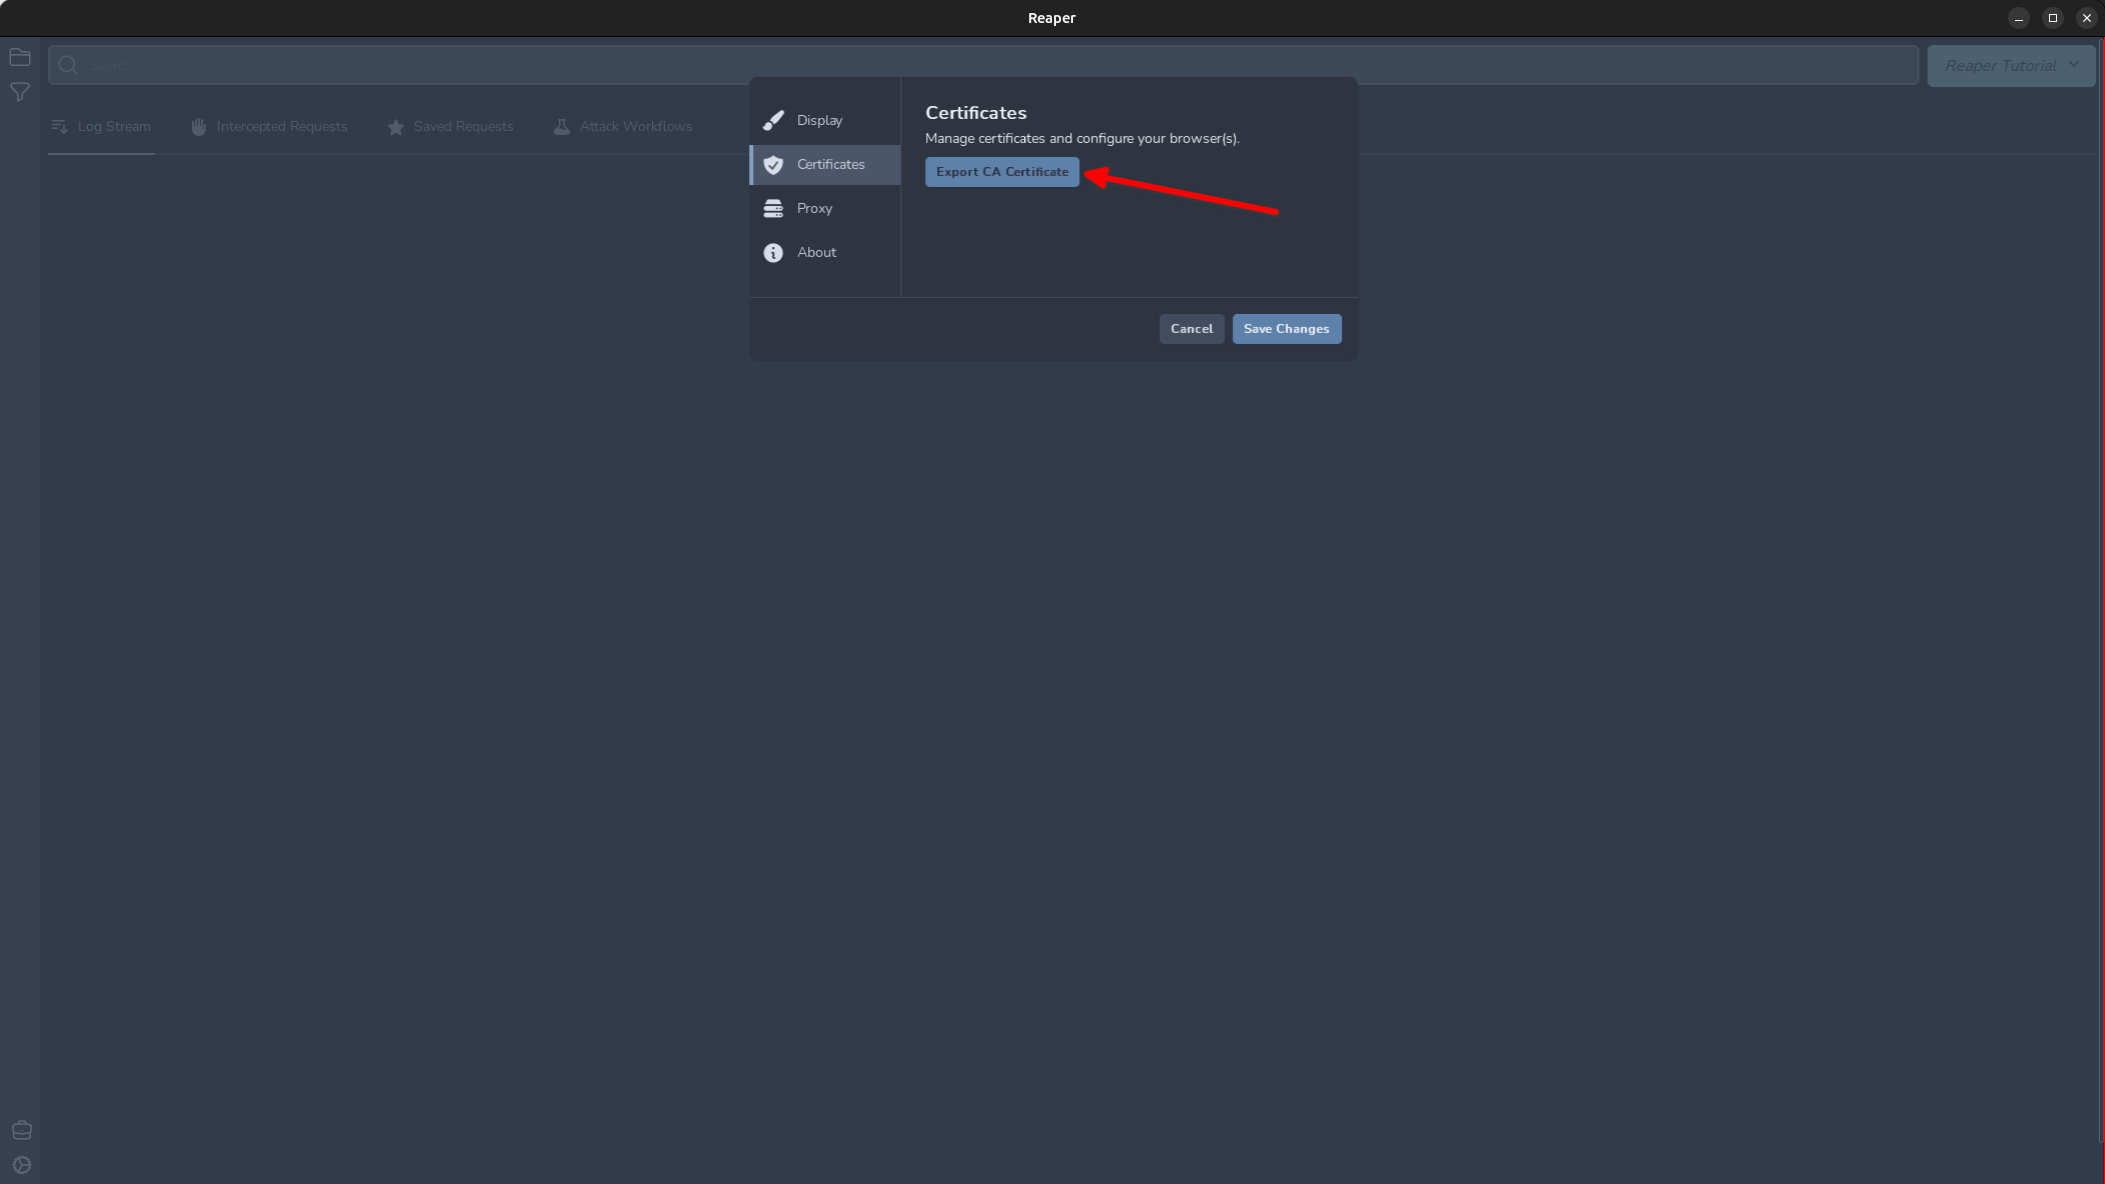
Export this now and save the certificate.
Ubuntu
OSX
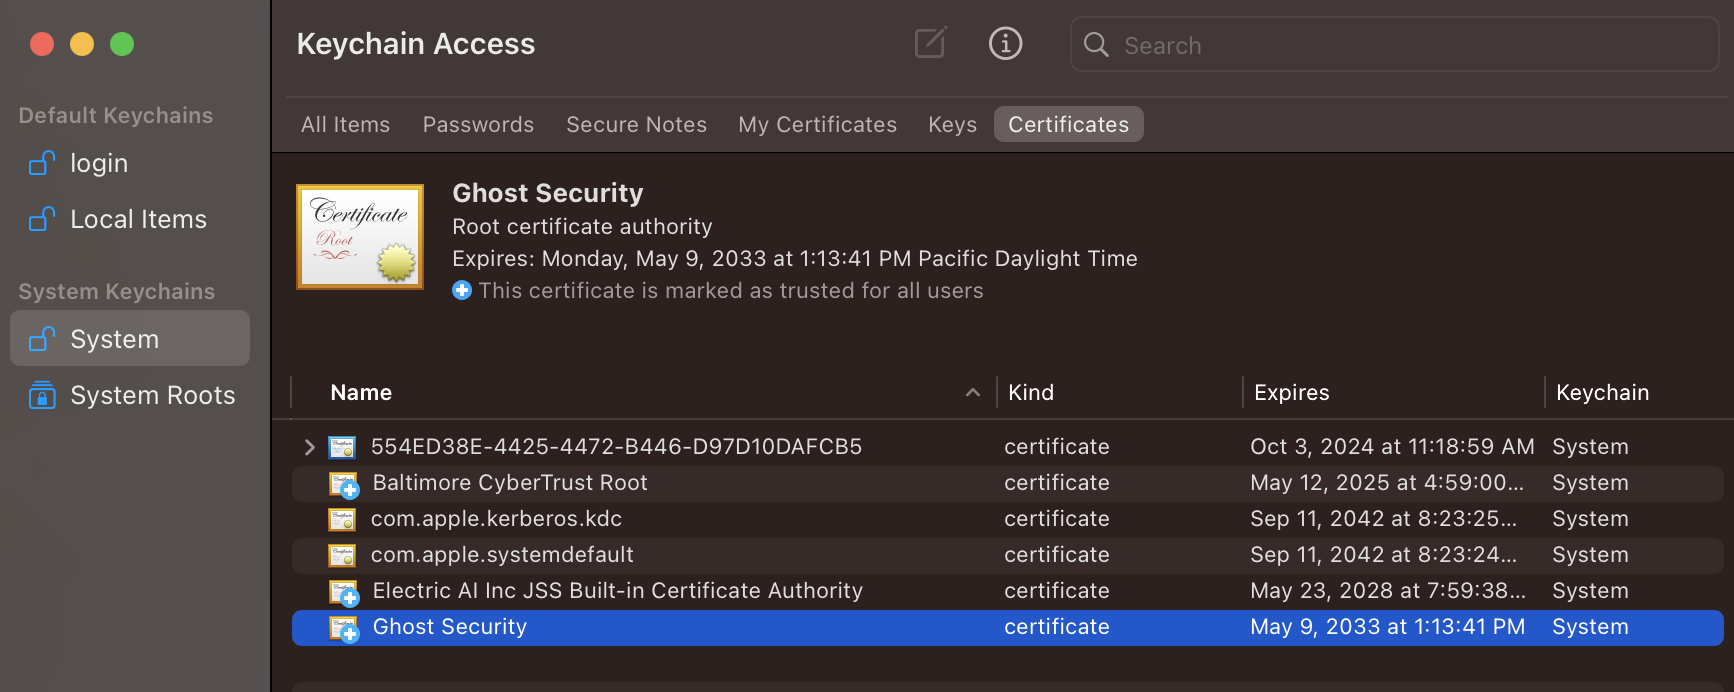
Press command + spacebar and open Keychain Access
Right click on “System” and click Unlock Keychain "System"
Drag and drop the ghost-ca.crt file into the “System” store.
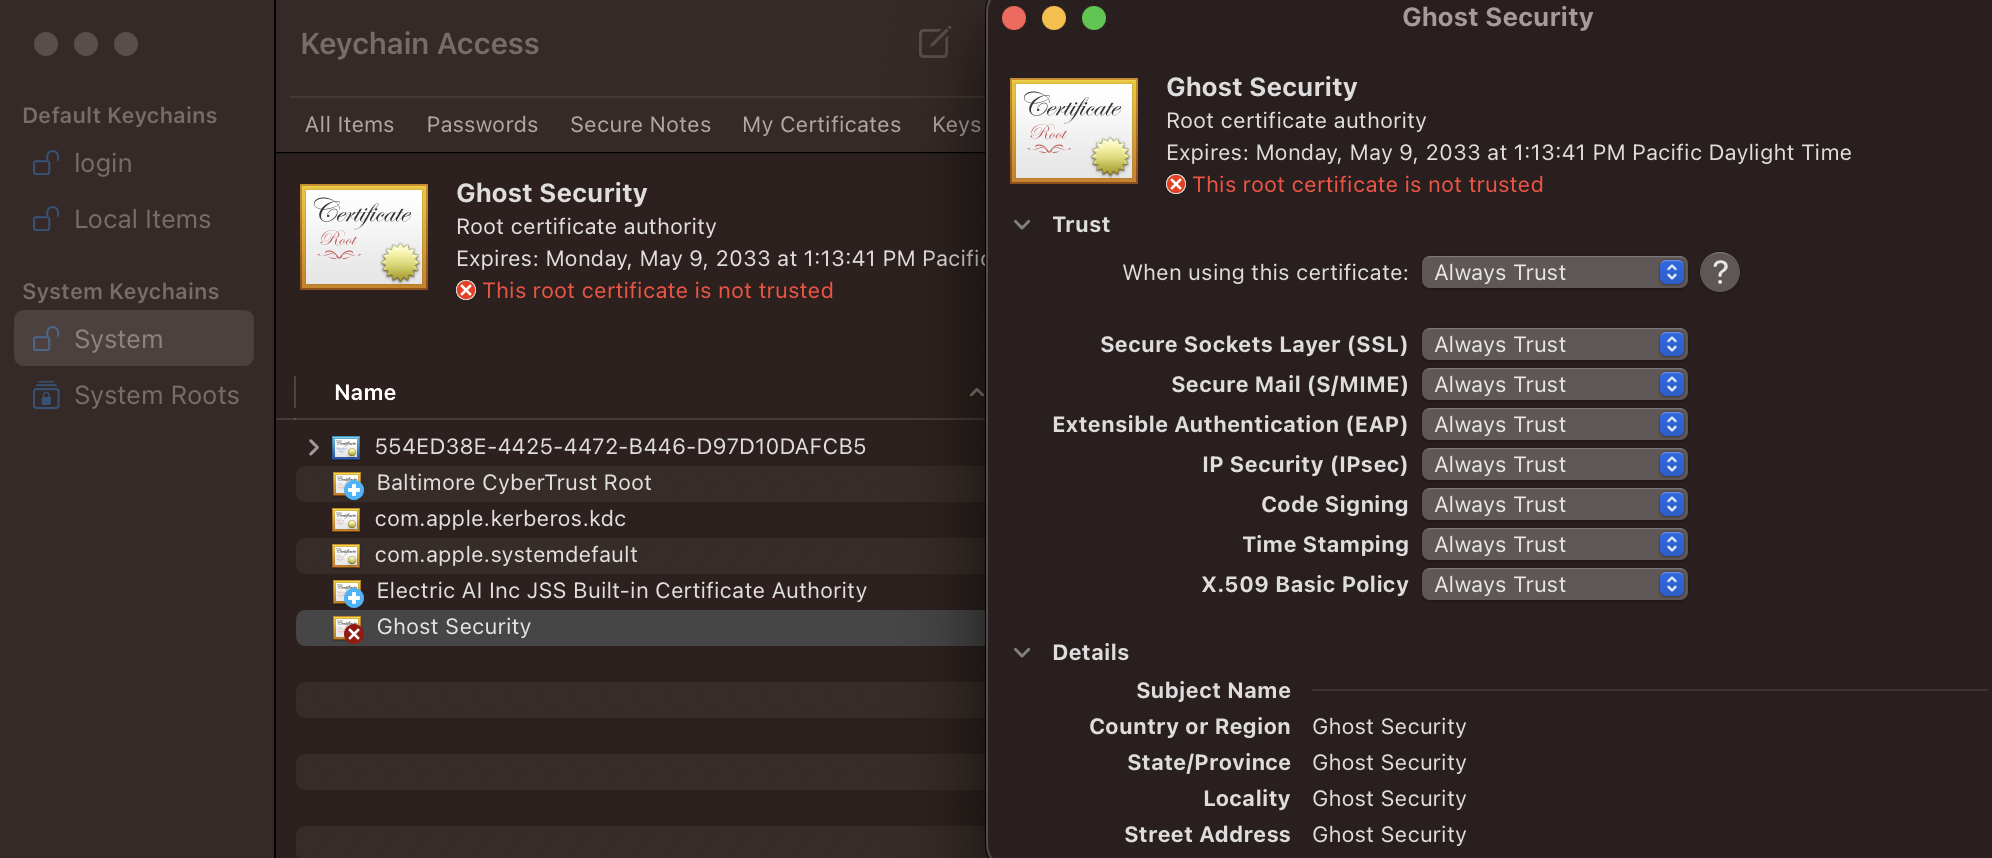
Right-click the certificate and click “Get Info” and then set the trust to “Always Trust”. Once the trust is set correctly, the red x icon will change to a blue +.
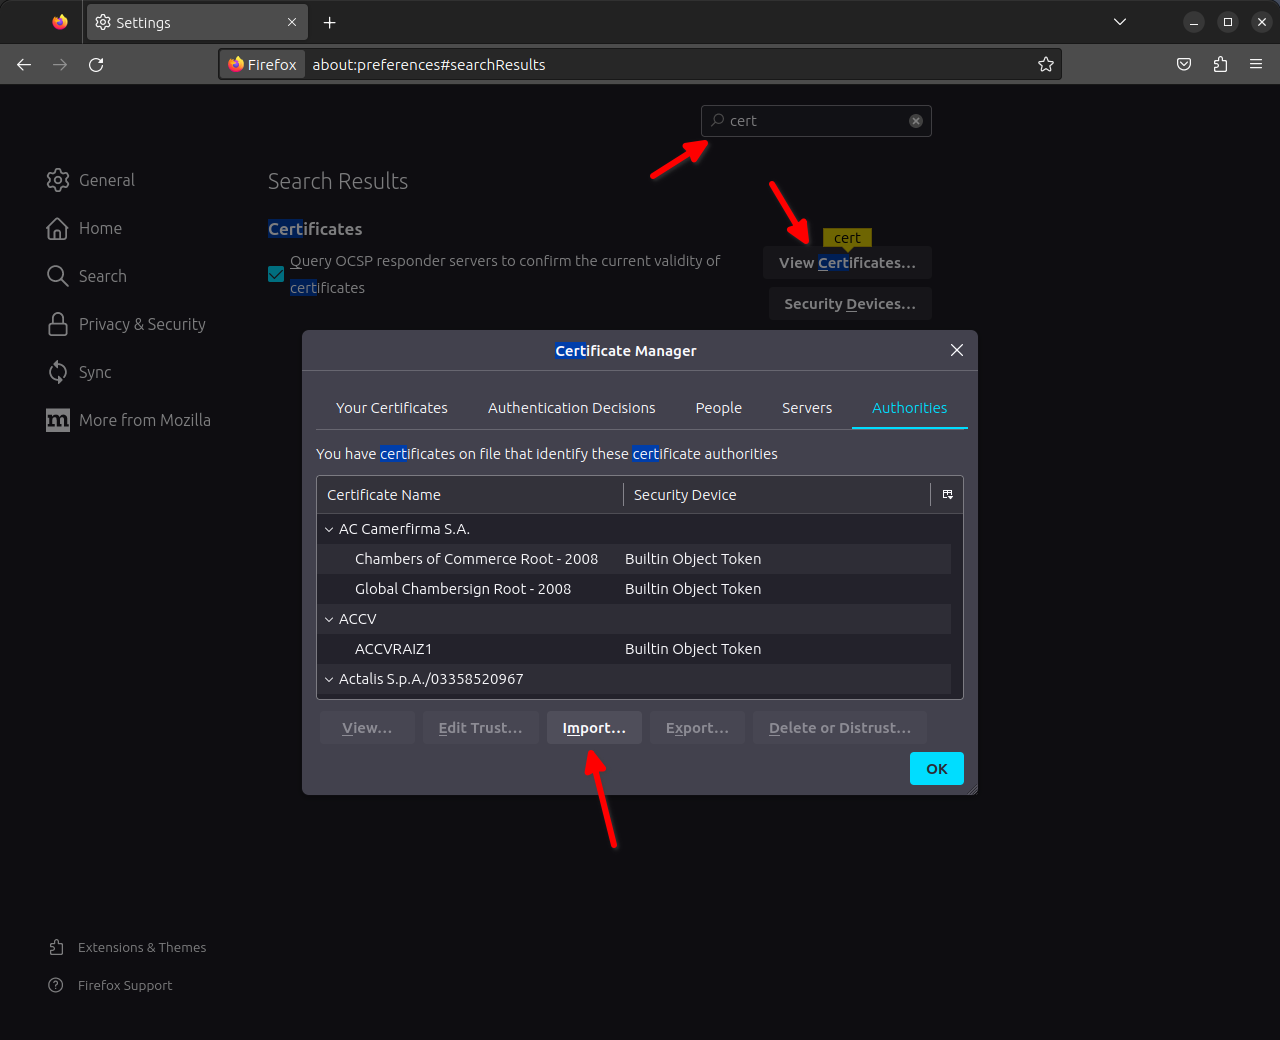
Firefox
Firefox uses its own certificate store separate from the system trust store. To import the CA cert for Firefox, open the “Settings” page and search for “certificate” then click “View Certificates…” and then “Import…”
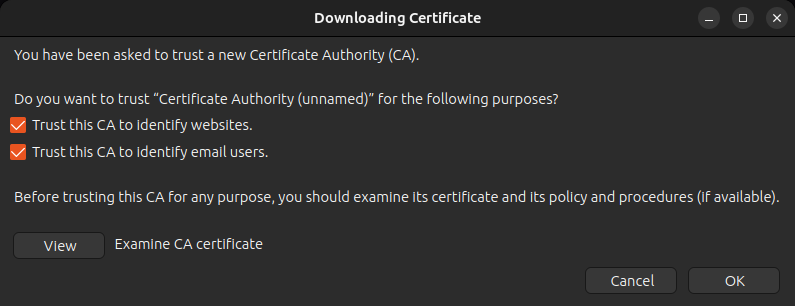
Import the ghost-ca.crt file and then select the checkboxes to trust the certificate and click OK.
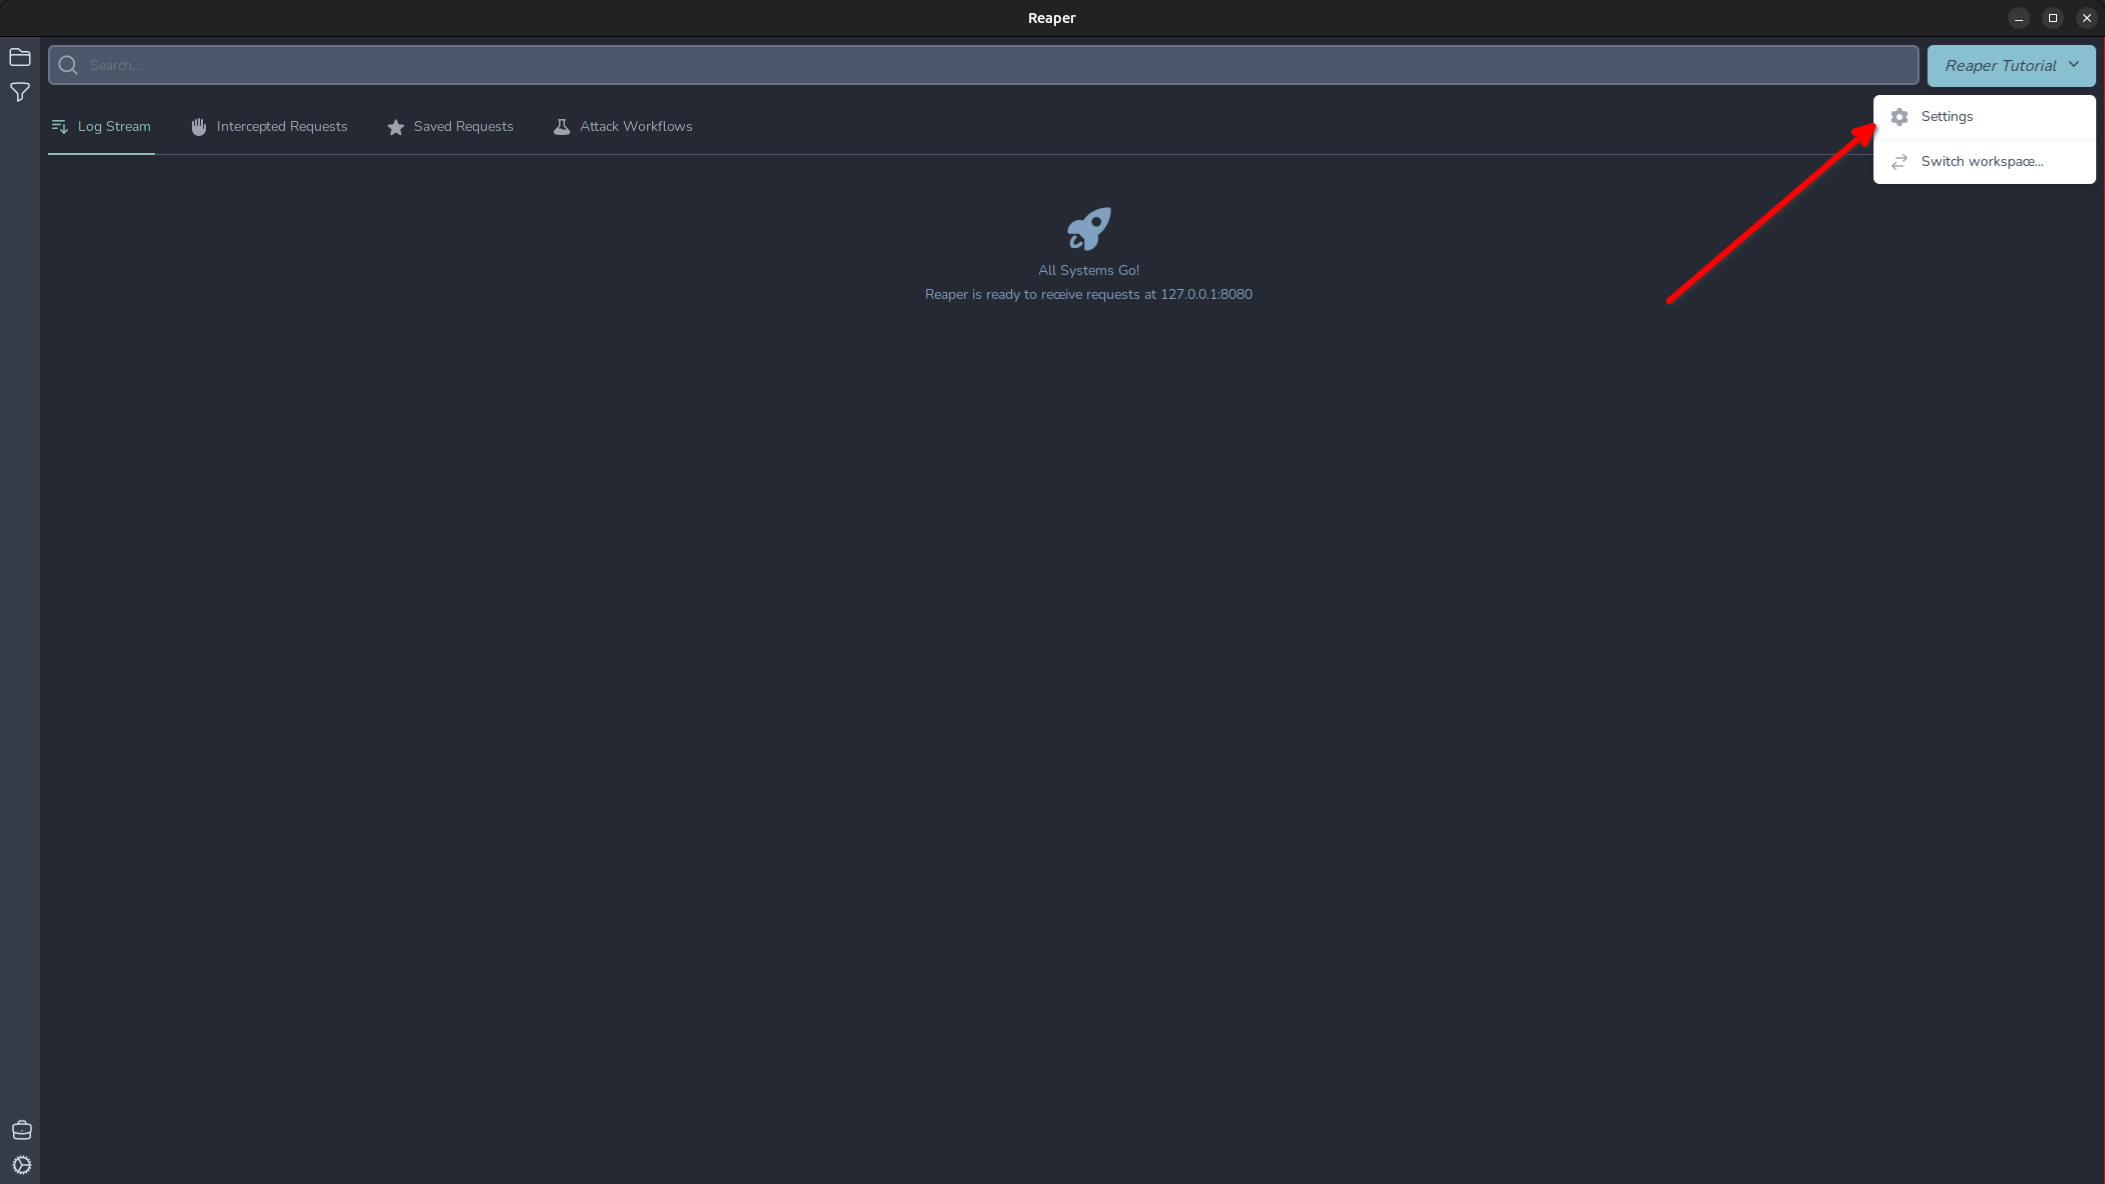
Intercepting and Modifying a Request
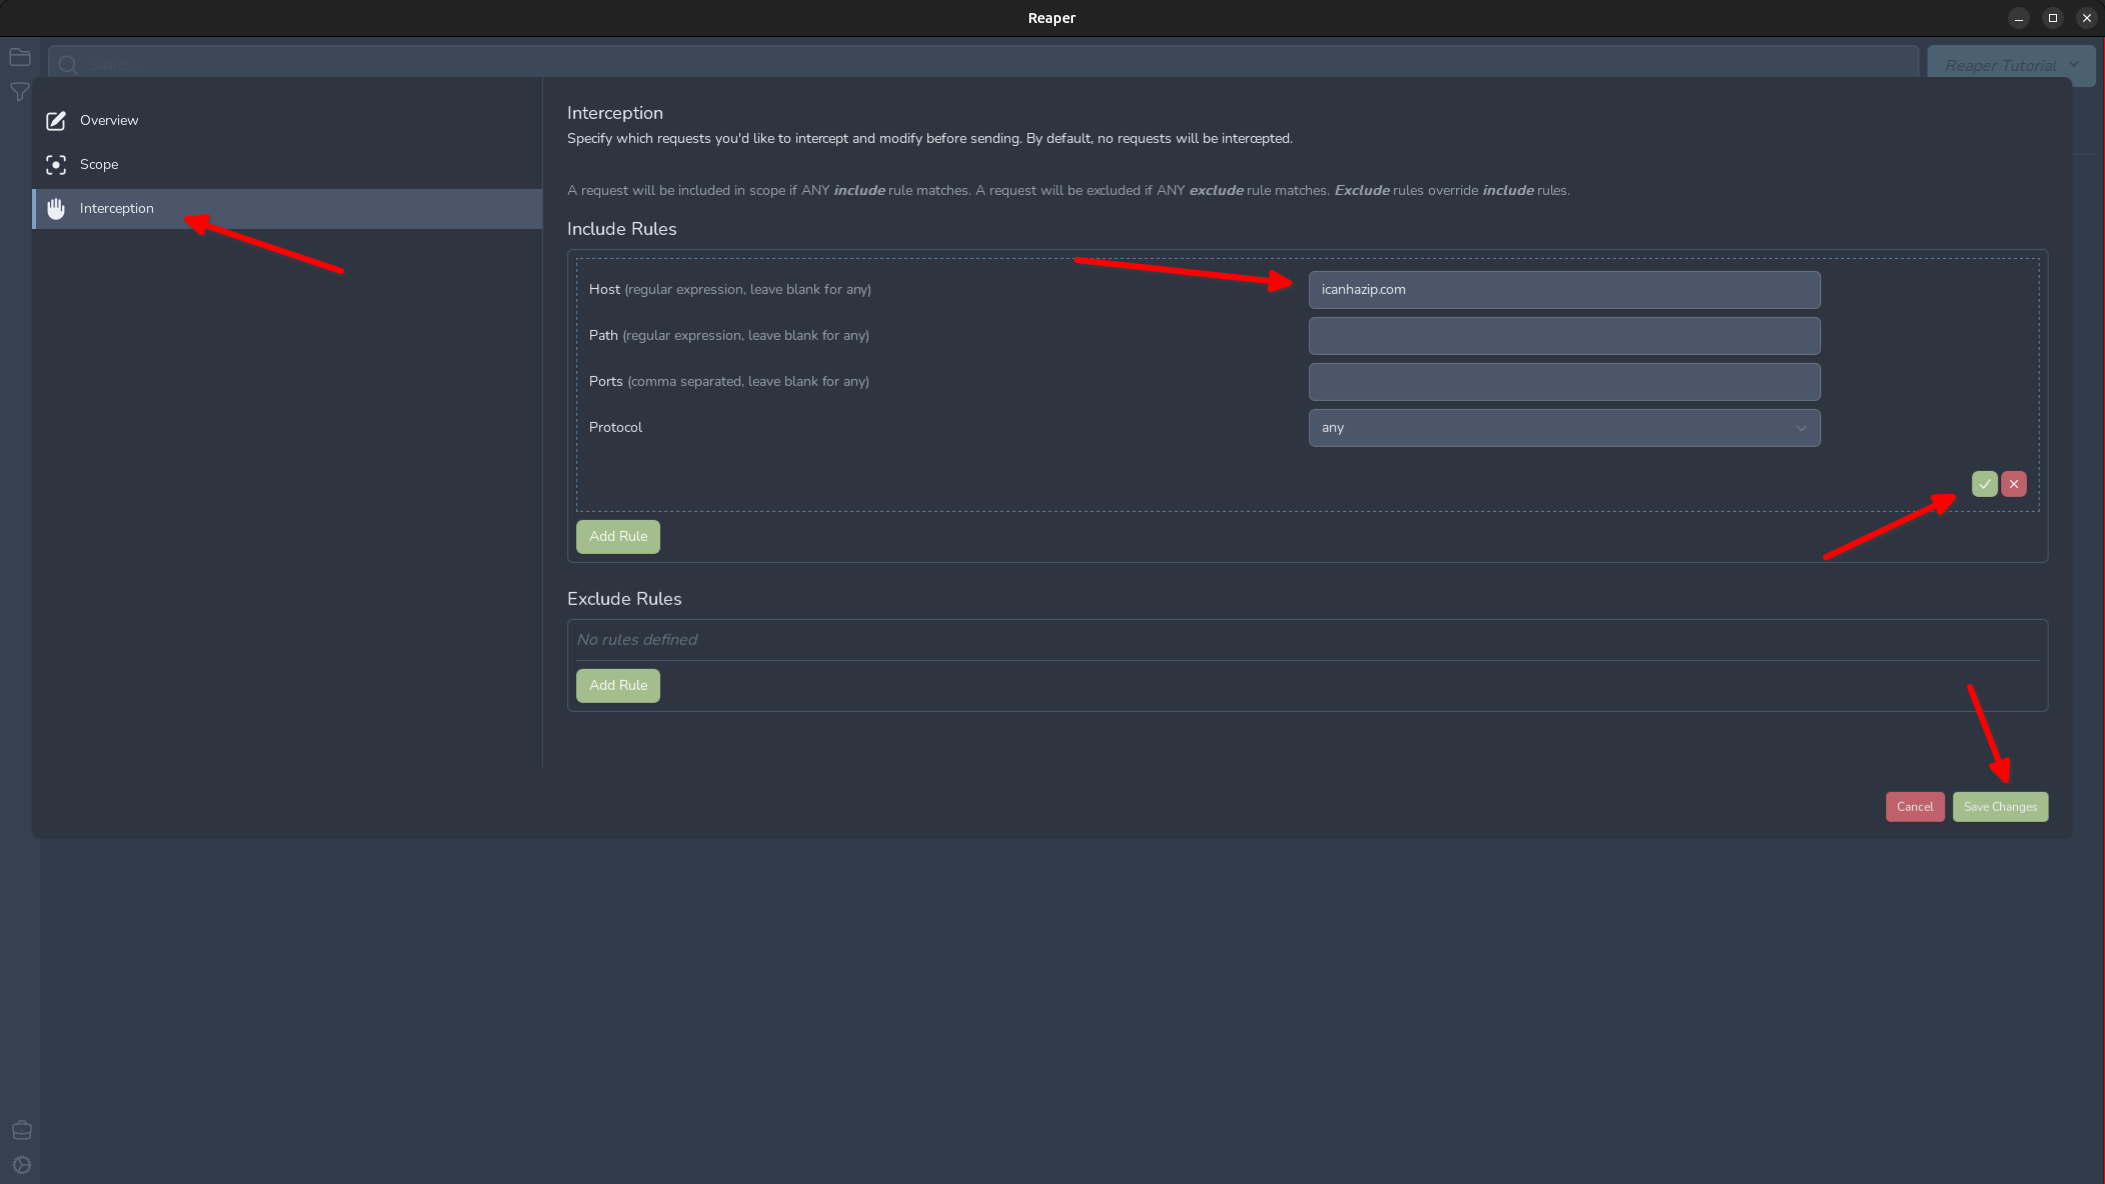
By default Reaper will not intercept any requests, just log them in the “Log Stream” pane. To access our workspace settings, click the project’s name in the top right and select “Settings”
Here we can enable and define interception rules. Lets do that now for the icanhazip.com domain.
Now we are ready to intercept our first request! I have made a launcher script that launches Google Chrome with the proxy options preconfigured, so you don’t have to interfere with system proxy settings which will proxy everything through Reaper. Make a request to https://icanhazip.com and you will see the “Intercepted Requests” tab has a notice that 1 request has been intercepted. Click the tab now and we can view the intercepted request.
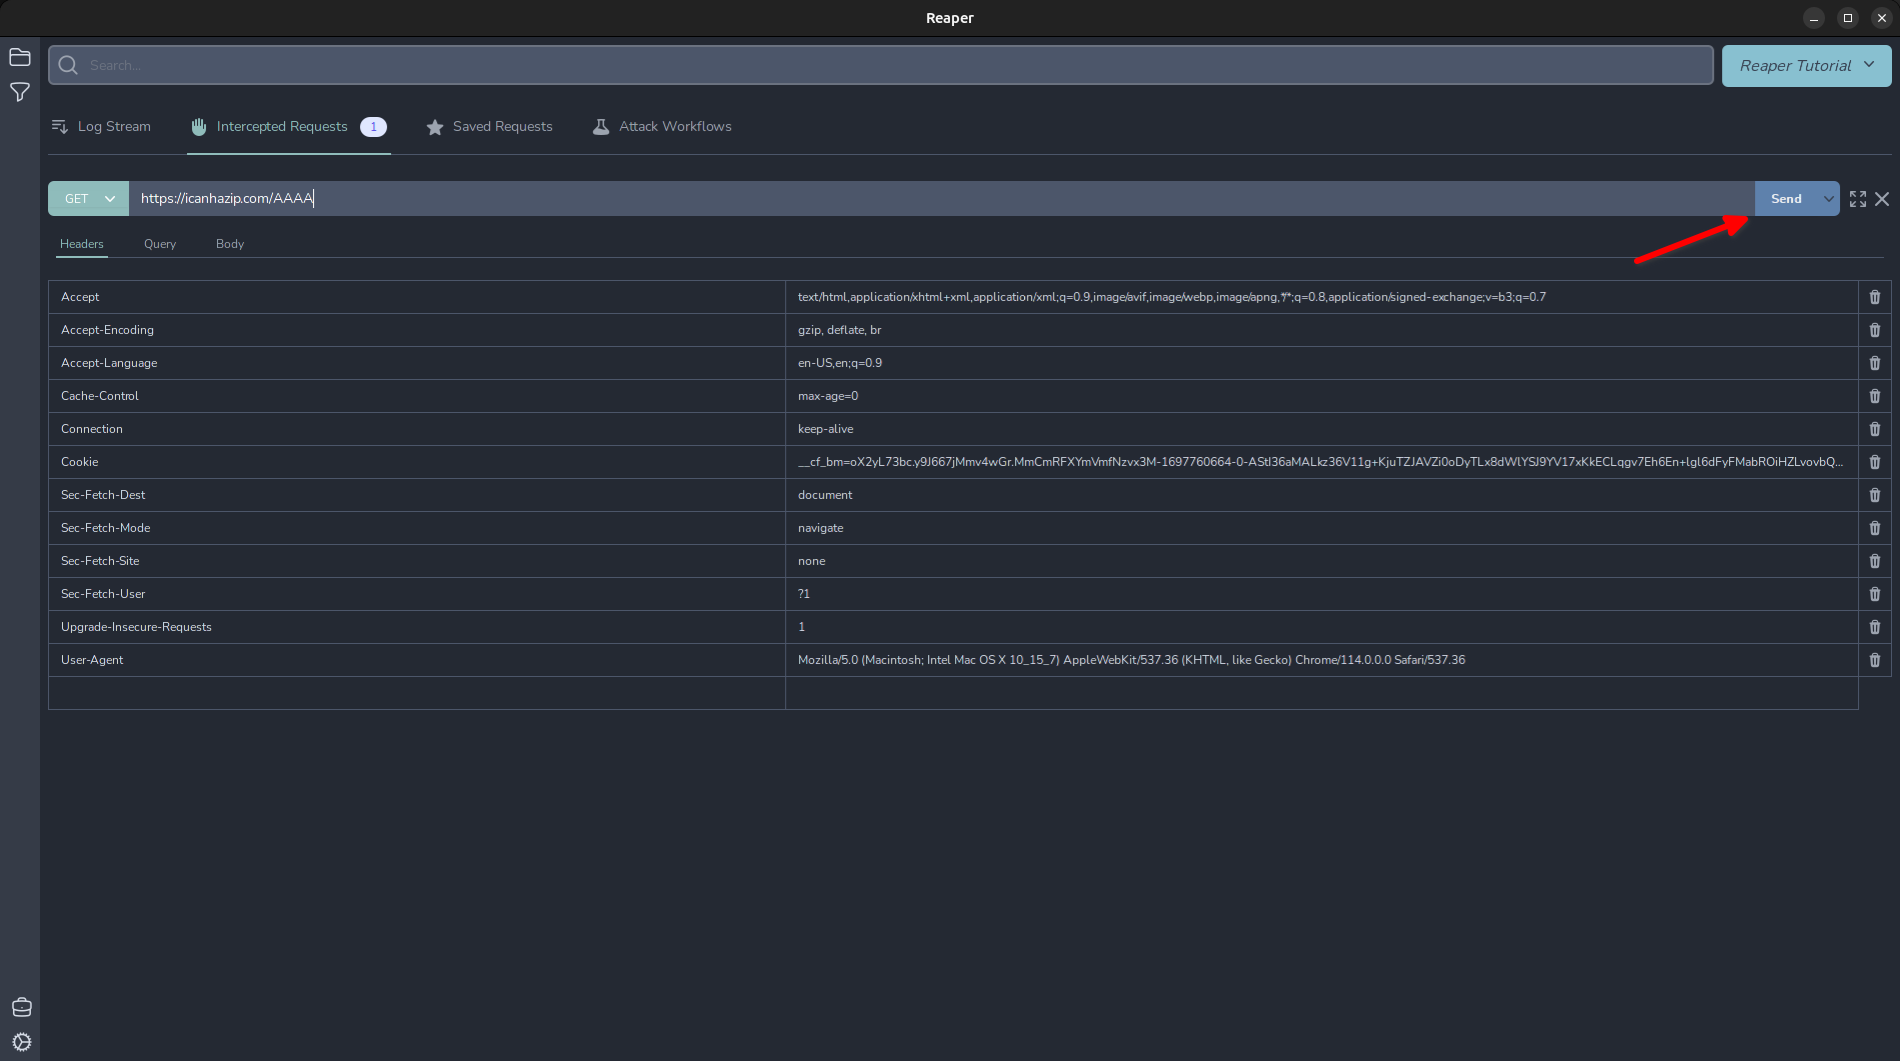
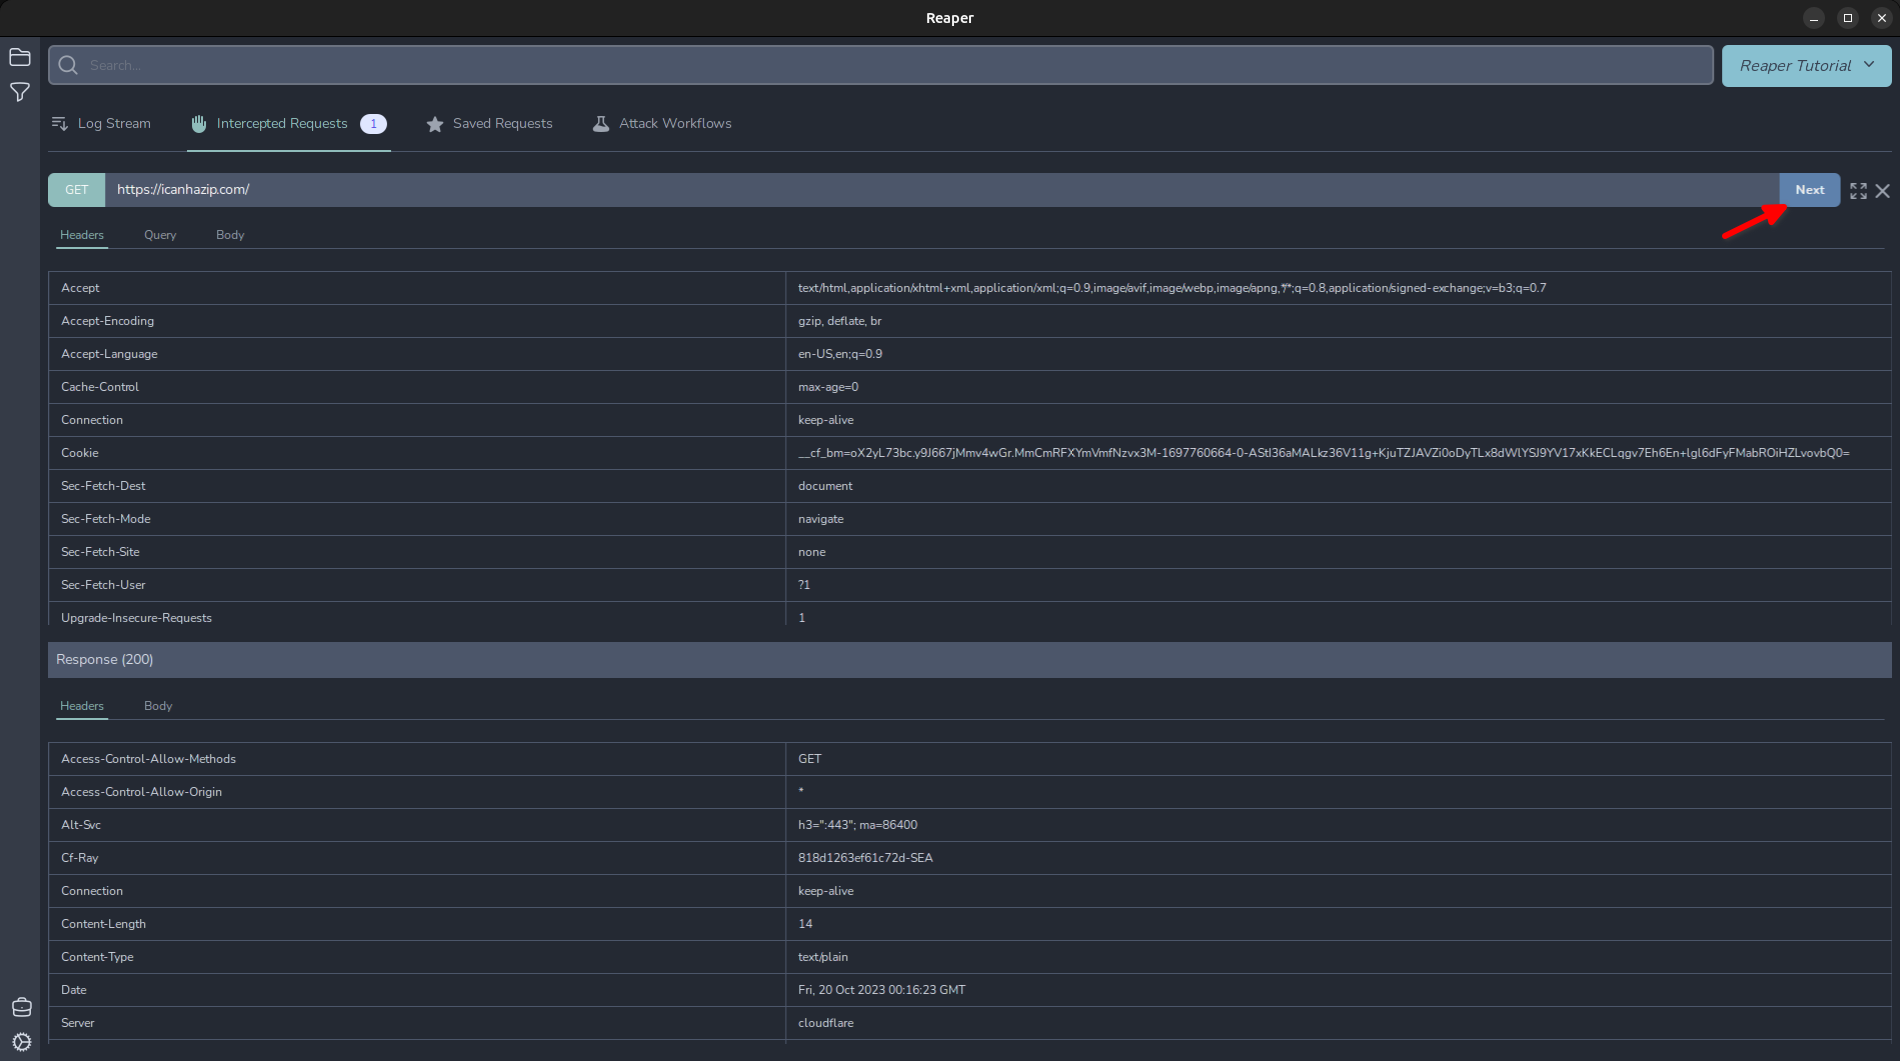
Now you can edit the request and click "Send" to forward the request with the modifications. Once the response is received, you can cycle through to the next request by clicking "Next".
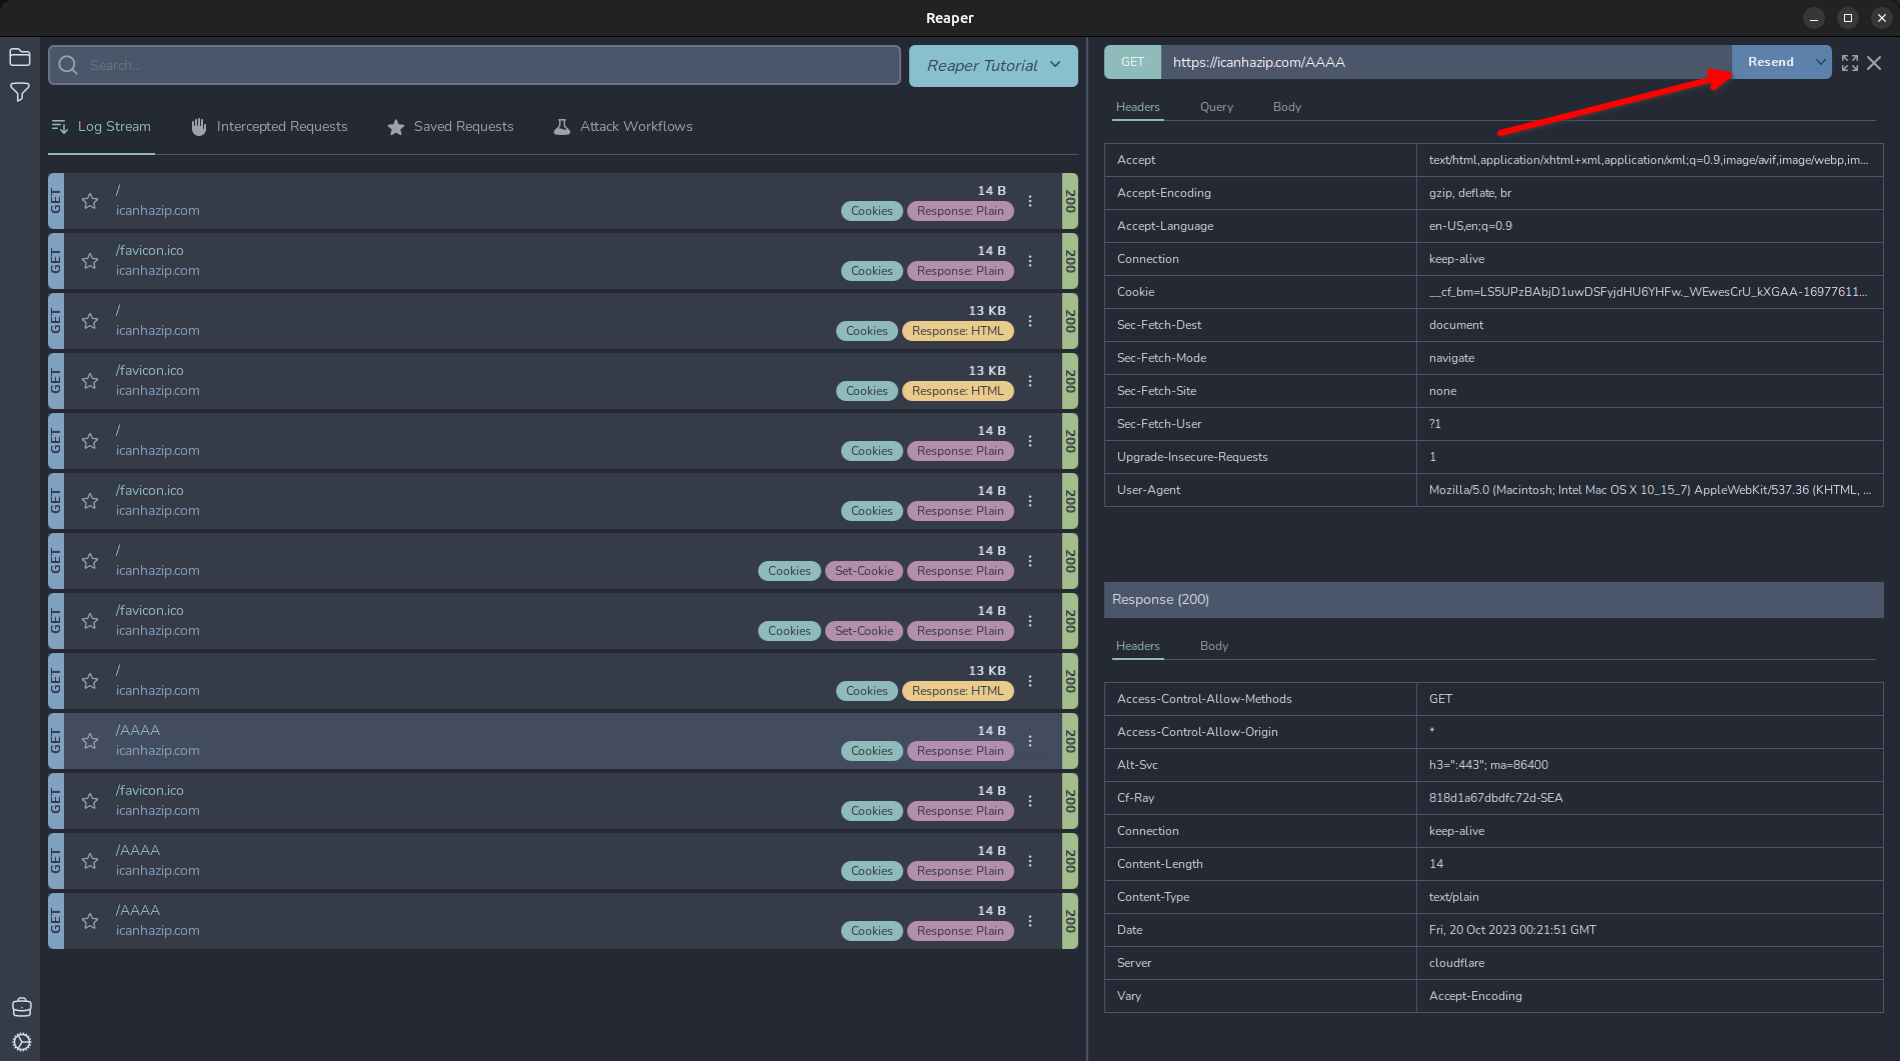
Replaying a Request
To replay a request, simply highlight the request and in the top right, click “Resend”. Note: If you have an intercept rule in place, it will intercept this replayed request so it can be modified before being sent, like in Burp’s repeater tab.
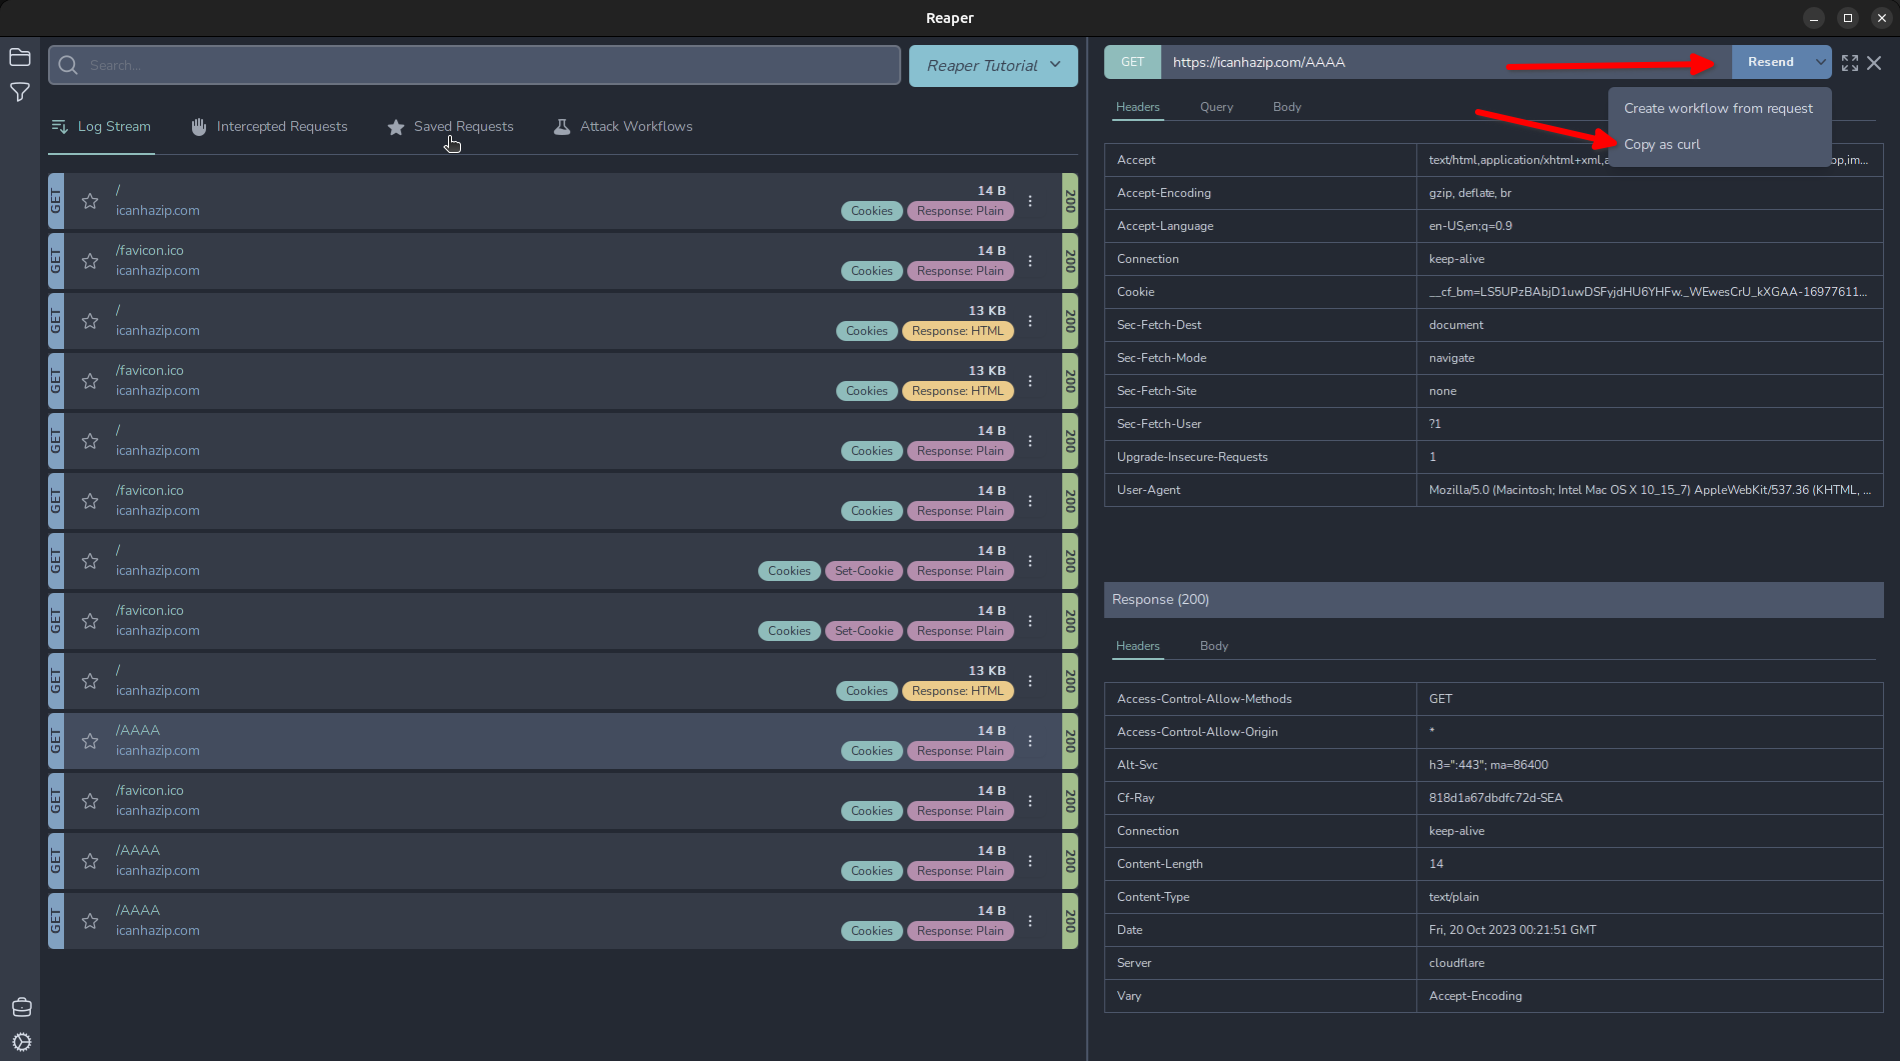
Alternatively, sometimes you just want to grab a request and play with it using cURL. In this case we can click the drop-down arrow next to “Resend” and click “Copy as curl”.
Fuzzing with Reaper
Like BurpSuite’s intruder tool, Reaper contains a workflow node that can accomplish some similar tasks to a Sniper/Battering Ram, Pitchfork, and ClusterBomb attack. Click a request we want to import to our workflow and click the drop-down arrow next to “Resend” and click “Create workflow from request”.

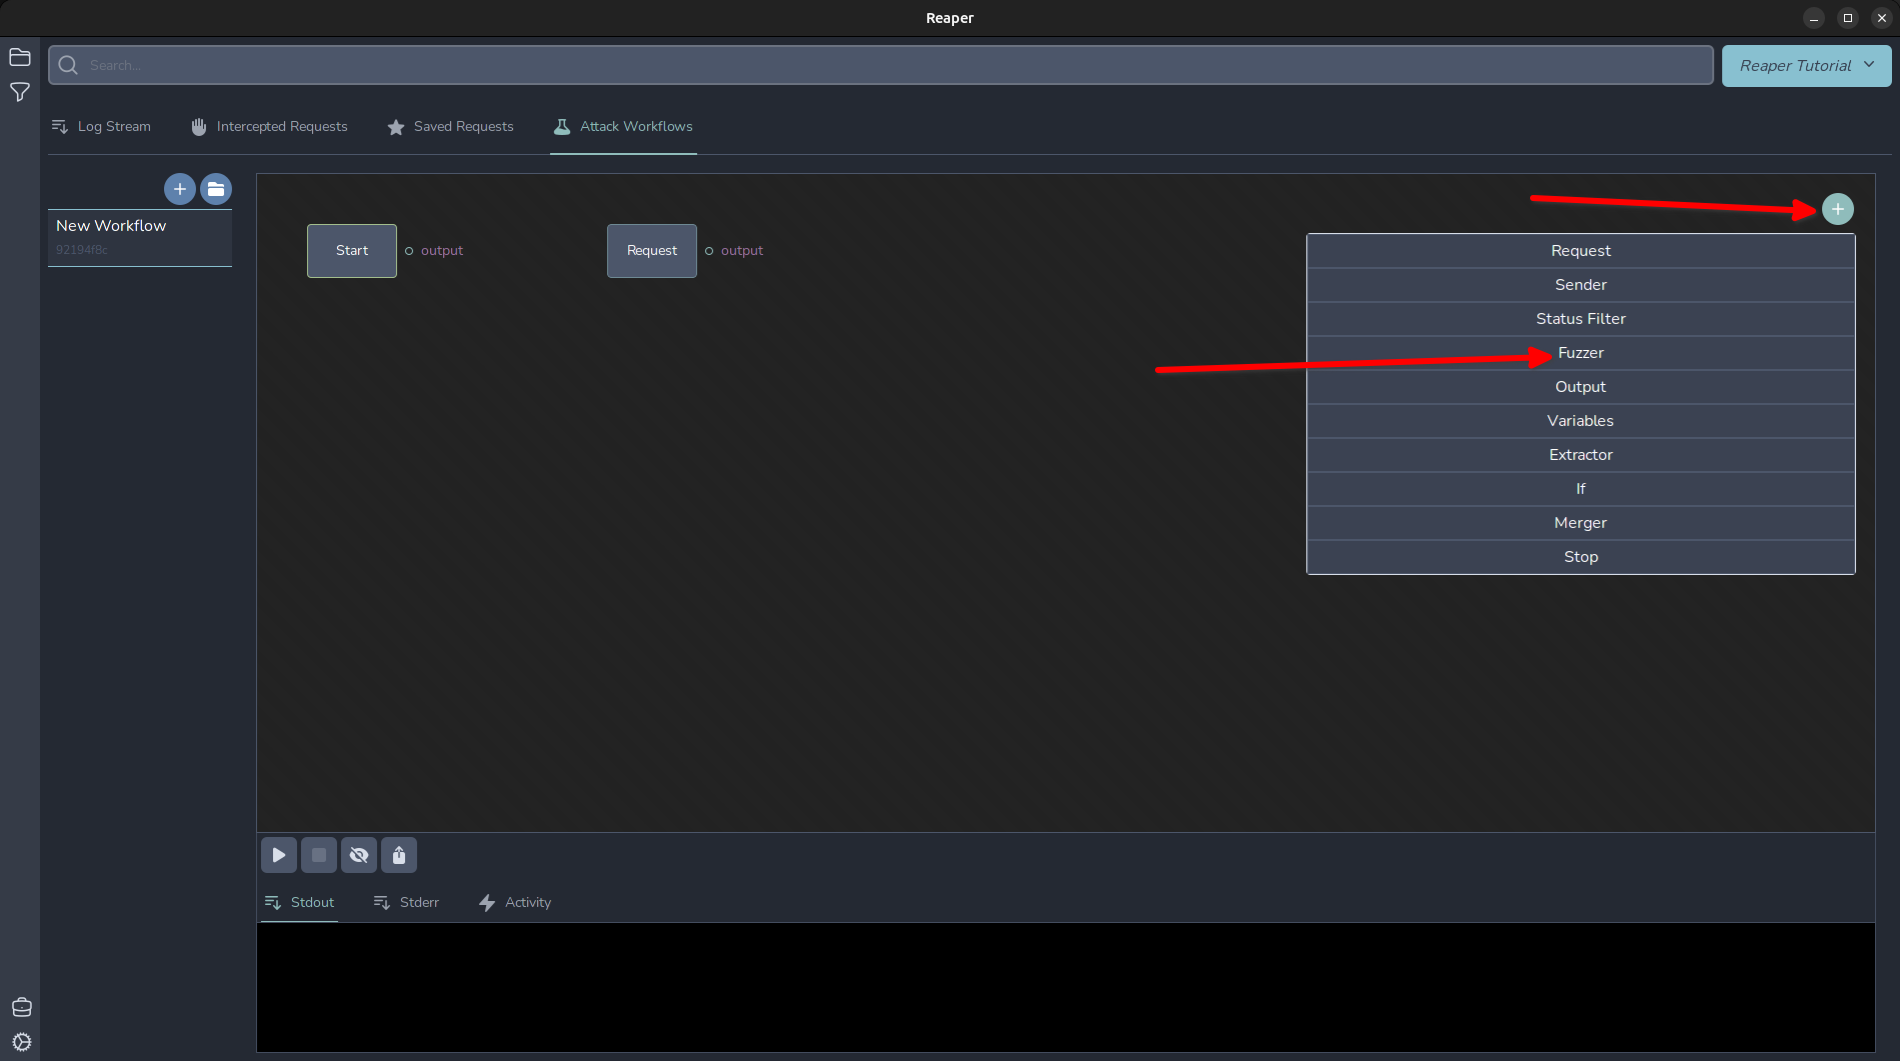
And it will import our request as a “Request” node object. Click that node and we can see our request has been successfully imported. We can modify any of the parameters here. For now, I will show a basic workflow, similar to Intruder’s “Sniper”. Click the + in the top right and add the “Fuzzer” from the menu.
To actually generate and send our request, we need to add a “Sender” node too. Lets add that and an Output node to capture and generate some output.
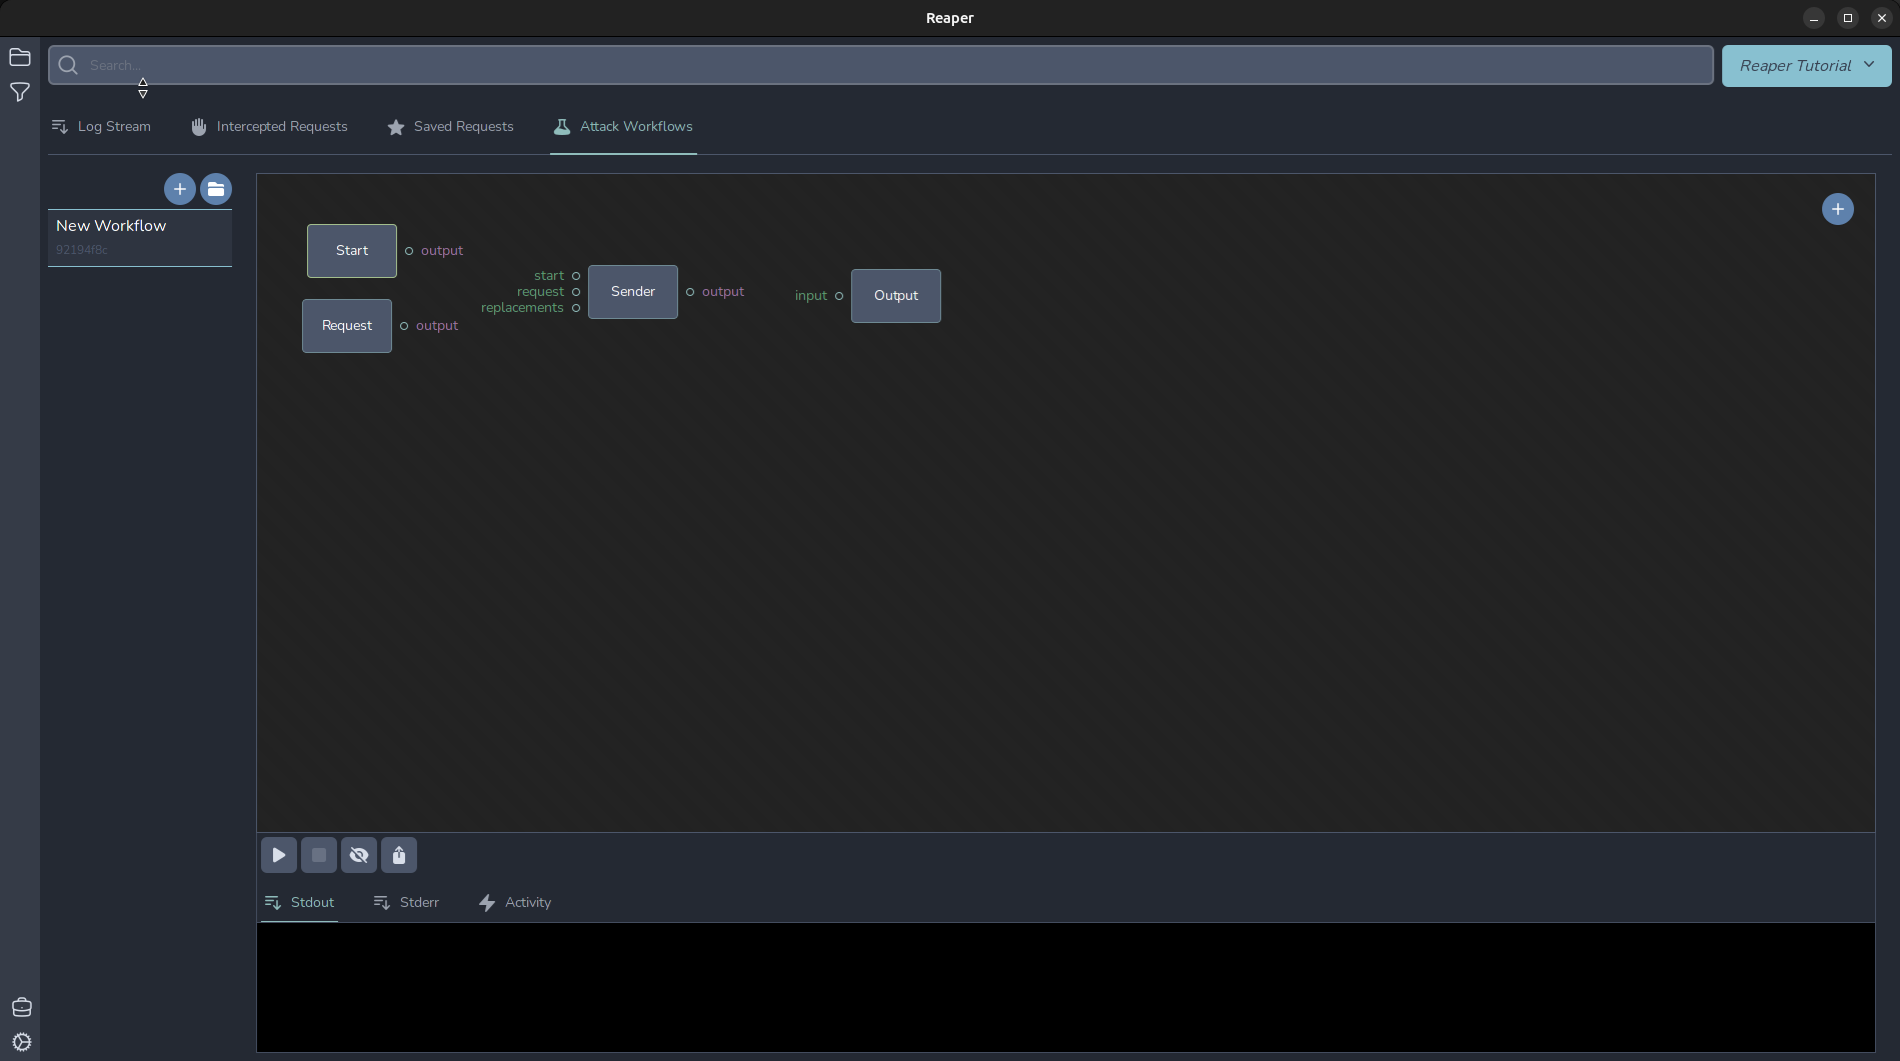
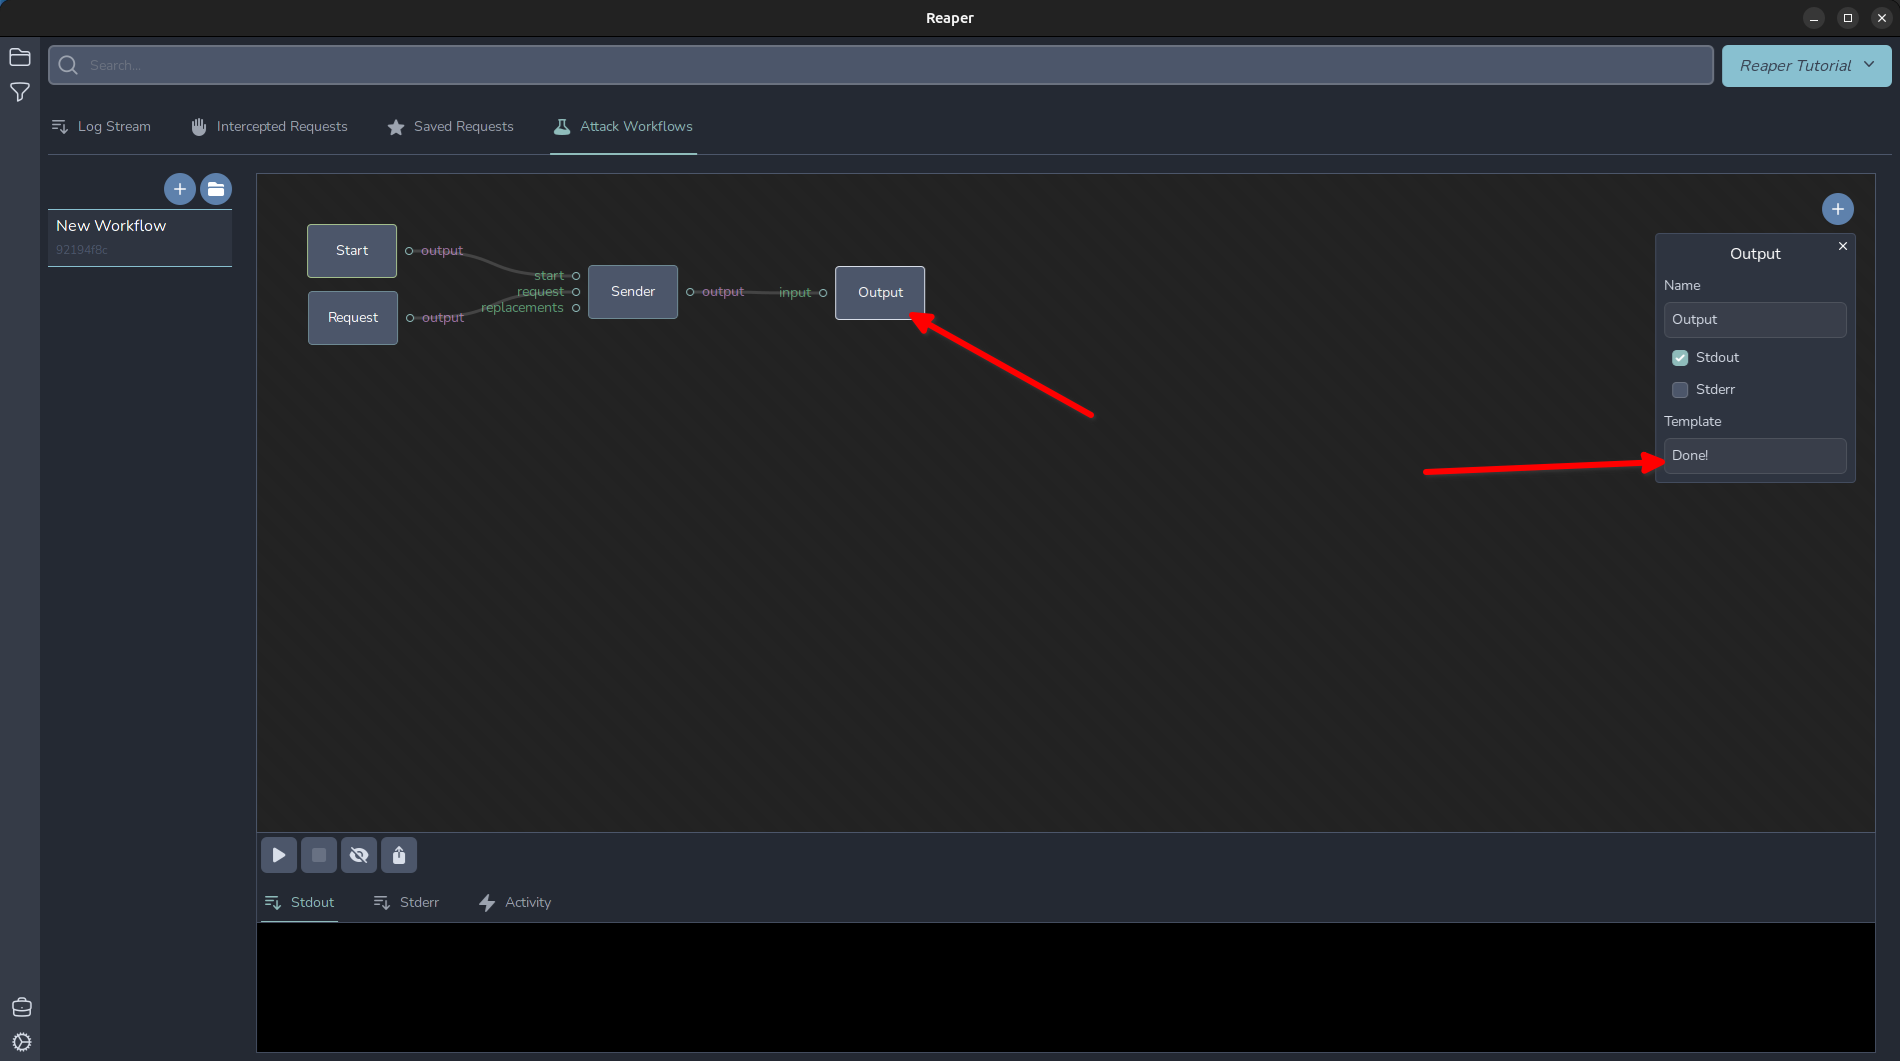
Let's wire it up and send the first request. A “Sender” node needs several inputs: A trigger event to trigger the request. This can come from the “replacements” or from the “start”. The “request” input is the formatted request to use. In this case, the one we imported. Then, move the mouse near the output section of “Start” and the circle will be highlighted. Once that has happened, click and hold the left mouse button and drag the wire over to attach it to the “start” of the “Sender” node. Repeat to wire everything up as shown. Then, click the “Output” node, and in the “Template” section type “Done!”
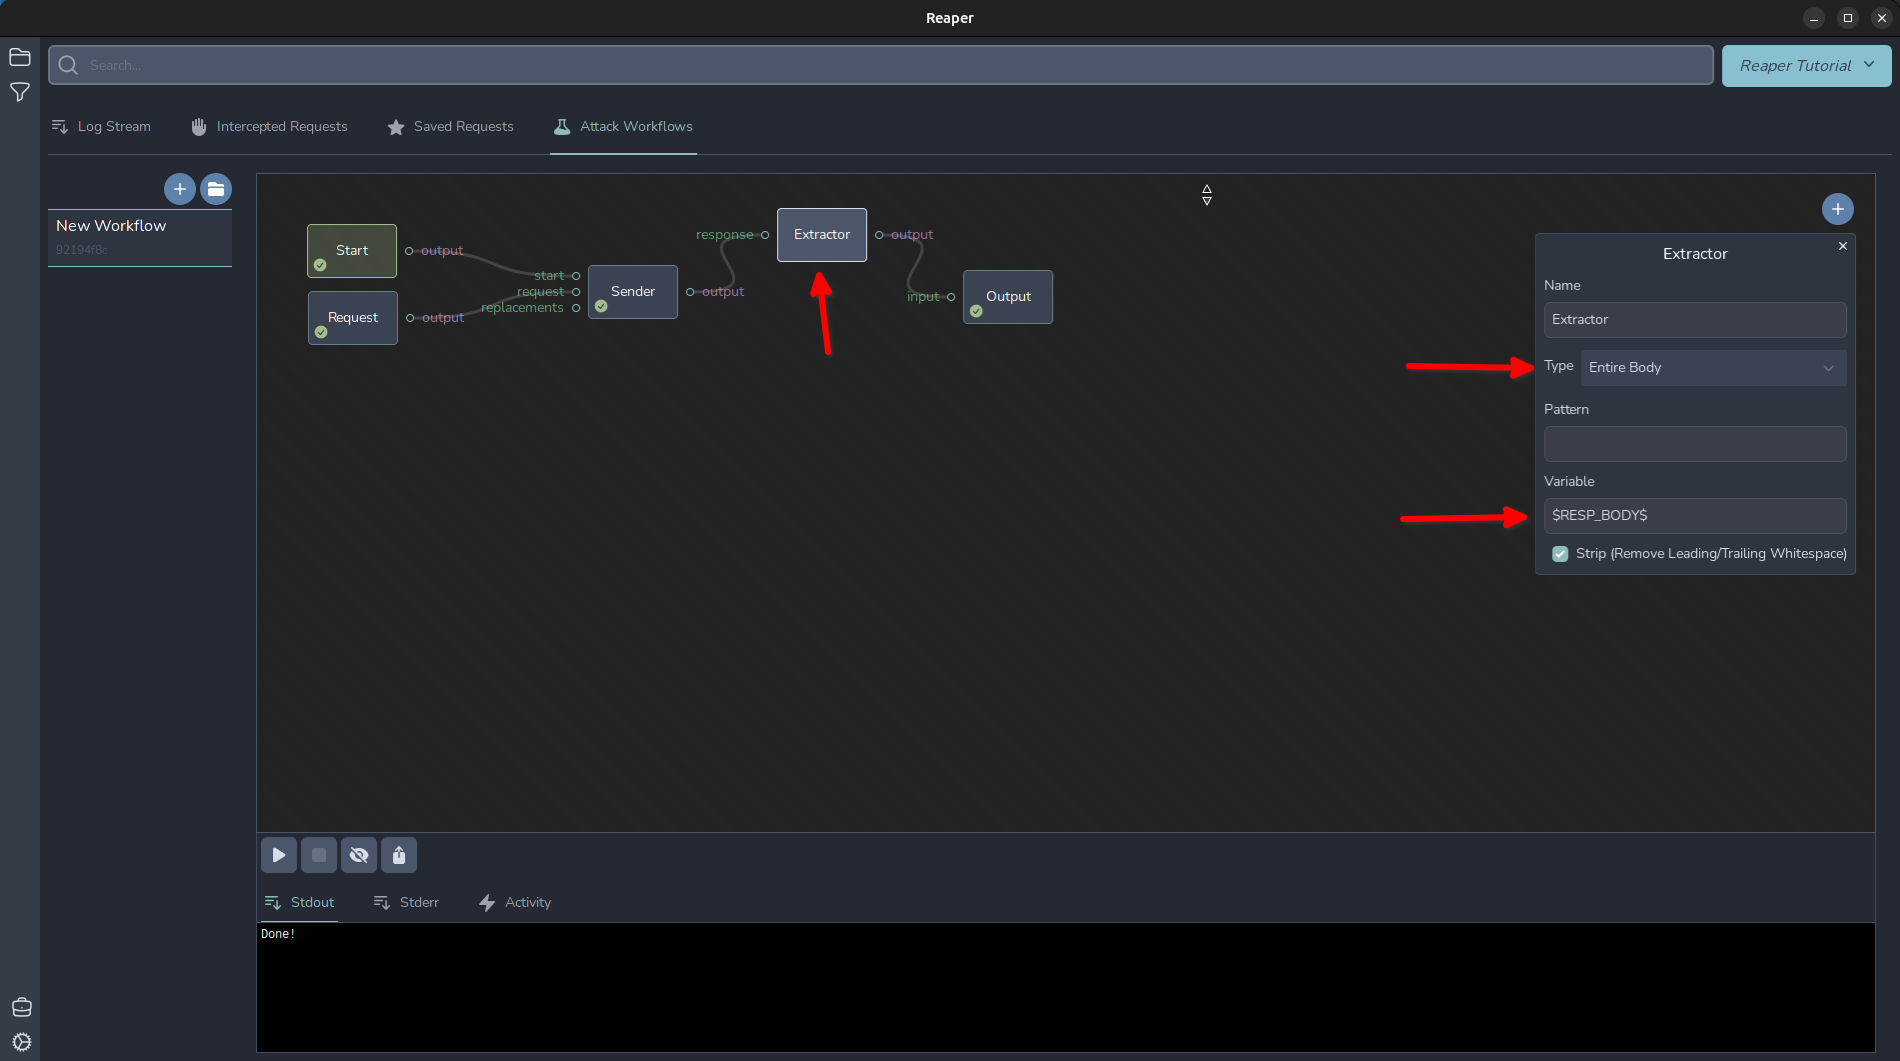
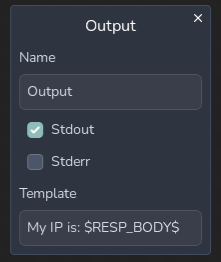
Now our basic workflow is ready to run! Click the play arrow in the bottom left and it will fire our request off. Now that we have the basics of wiring up a workflow, let's capture and display our IP address returned in the response. Add another node, this time adding an “Extractor” node. Disconnect our sender’s output from the Output node and instead connect the Sender to the “response” of the Extractor and the output of the Extractor to the Output node. Click the “Extractor” node and select “Entire Body” from the Type menu, and I set the variable I want this captured in to $RESP_BODY$ and then I changed my Output template to the following: My IP is: $RESP_BODY$
In Reaper, variables are named in between two $ characters and can be accessed in anything from output to request nodes, in the event we want to say, replace a header value.
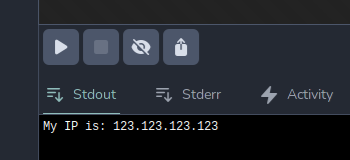
 Then click the play button again, and we should see our IP displayed in the output window!
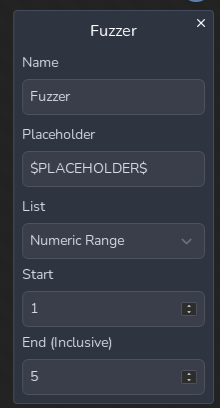
Next, let’s try adding a Fuzzer to show a basic fuzz similar to Burp’s Intruder sniper tool. Click on the Fuzzer to open its menu. Let’s change the placeholder variable’s name. We will set it to $PLACEHOLDER$ And change our numeric list to run from 0 to 5. The Fuzzer node will replace anything with that placeholder with the values in its list, during its loop phase. We will need to rewire our workflow to leverage the fuzzer. Anything connected to the right of the fuzzer is “downstream” of the Fuzzer and will be within its loop. Then we need to take advantage of the fuzzer, so I modified the URL in the request to include the $PLACEHOLDER$ variable. I also changed my output template to Request $PLACEHOLDER$, My IP is: $RESP_BODY$
We wire the fuzzer’s “output” to a sender's “replacements” option.
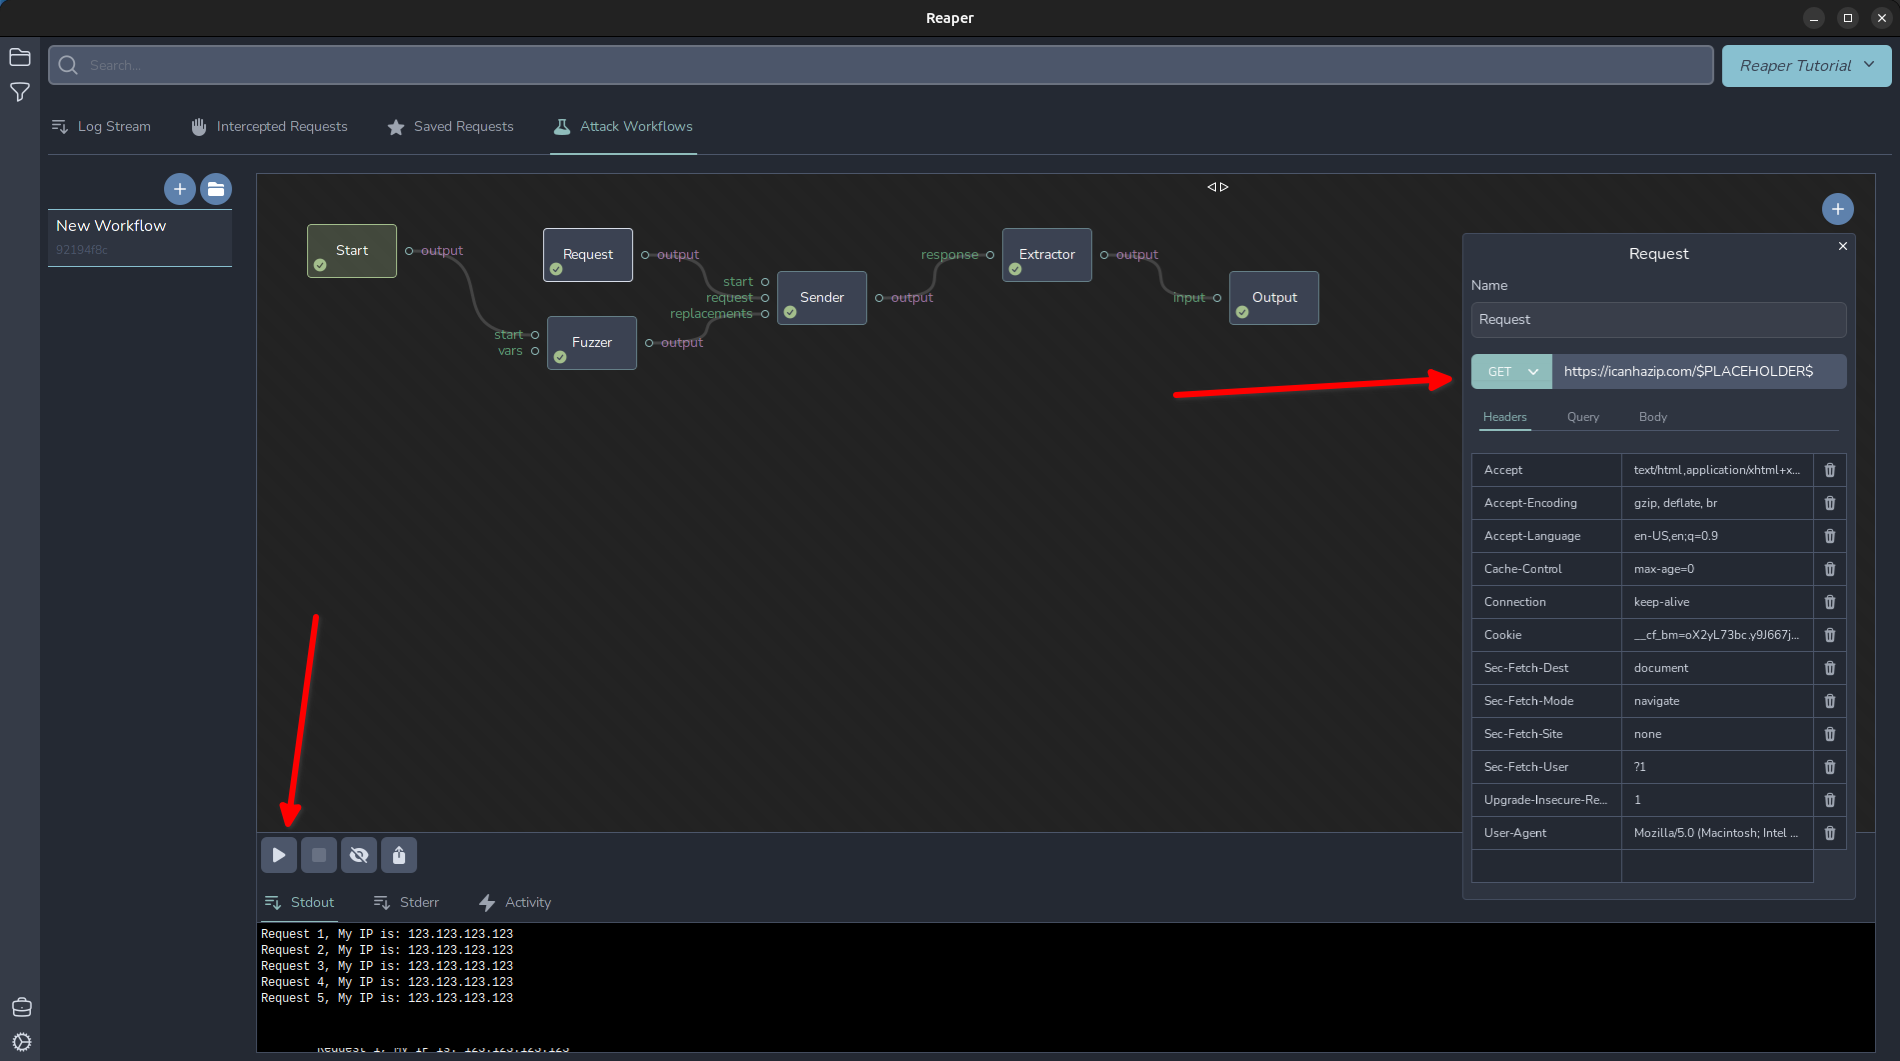
After clicking play, we can see we fired off 5 requests to http://icanhazip.com/0, http://icanhazip.com/1, and so forth.
More advanced fuzzing: Pitch Fork
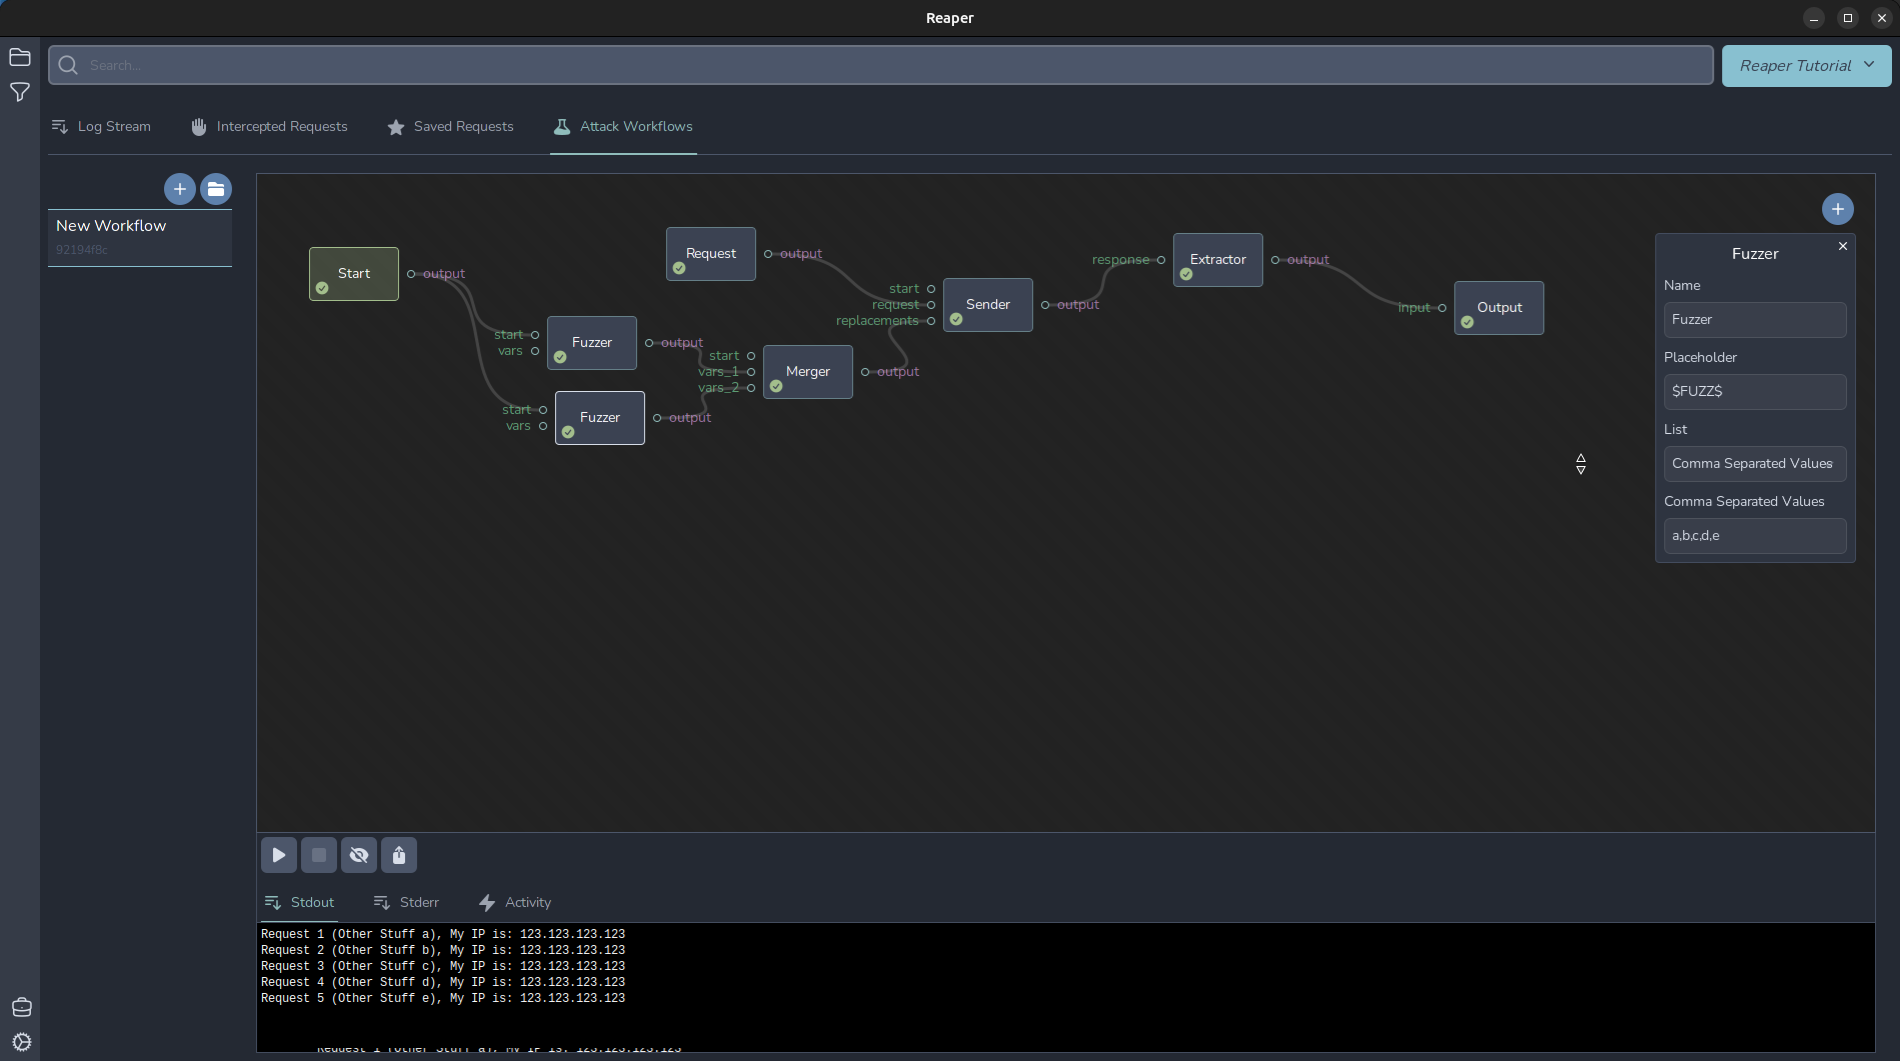
We can accomplish a similar task as intruder’s “Pitchfork” attack type. To do this, wire up two Fuzzers to the start node. This will loop through each payload set simeltaneously. Lets add another fuzzer node and a merger node. The merger node will merge two sets of variables together to input them into the “replacements” section of the sender.
I simply set mine to use the CSV: a,b,c,d,e and changed my output to Request $PLACEHOLDER$ (Other Stuff $FUZZ$), My IP is: $RESP_BODY$
92194f8c-85cd-4ce8-aab6-96298b973db4.atk
You can import this workflow to play with yourself. Download the atk file and click the folder icon in your workflow pane, and select the file to import it.

More advanced fuzzing: Cluster Bomb
Another common Intruder attack type is the “Cluster Bomb”, which will -++ all possible combinations of the different payload sets. In Reaper, you can consider a Fuzzer node like a for loop. Daisy chaining multiple fuzzers together will create the conditions for a “Cluster Bomb” style attack. I set my Output to Payload Set 1: $FUZZ_A$, Payload Set 2: $FUZZ_B$, My IP is: $RESP_BODY$
And Fuzzer A to use a numeric list from 1-5, and Fuzzer B to use a CSV of a,b,c,d,e,f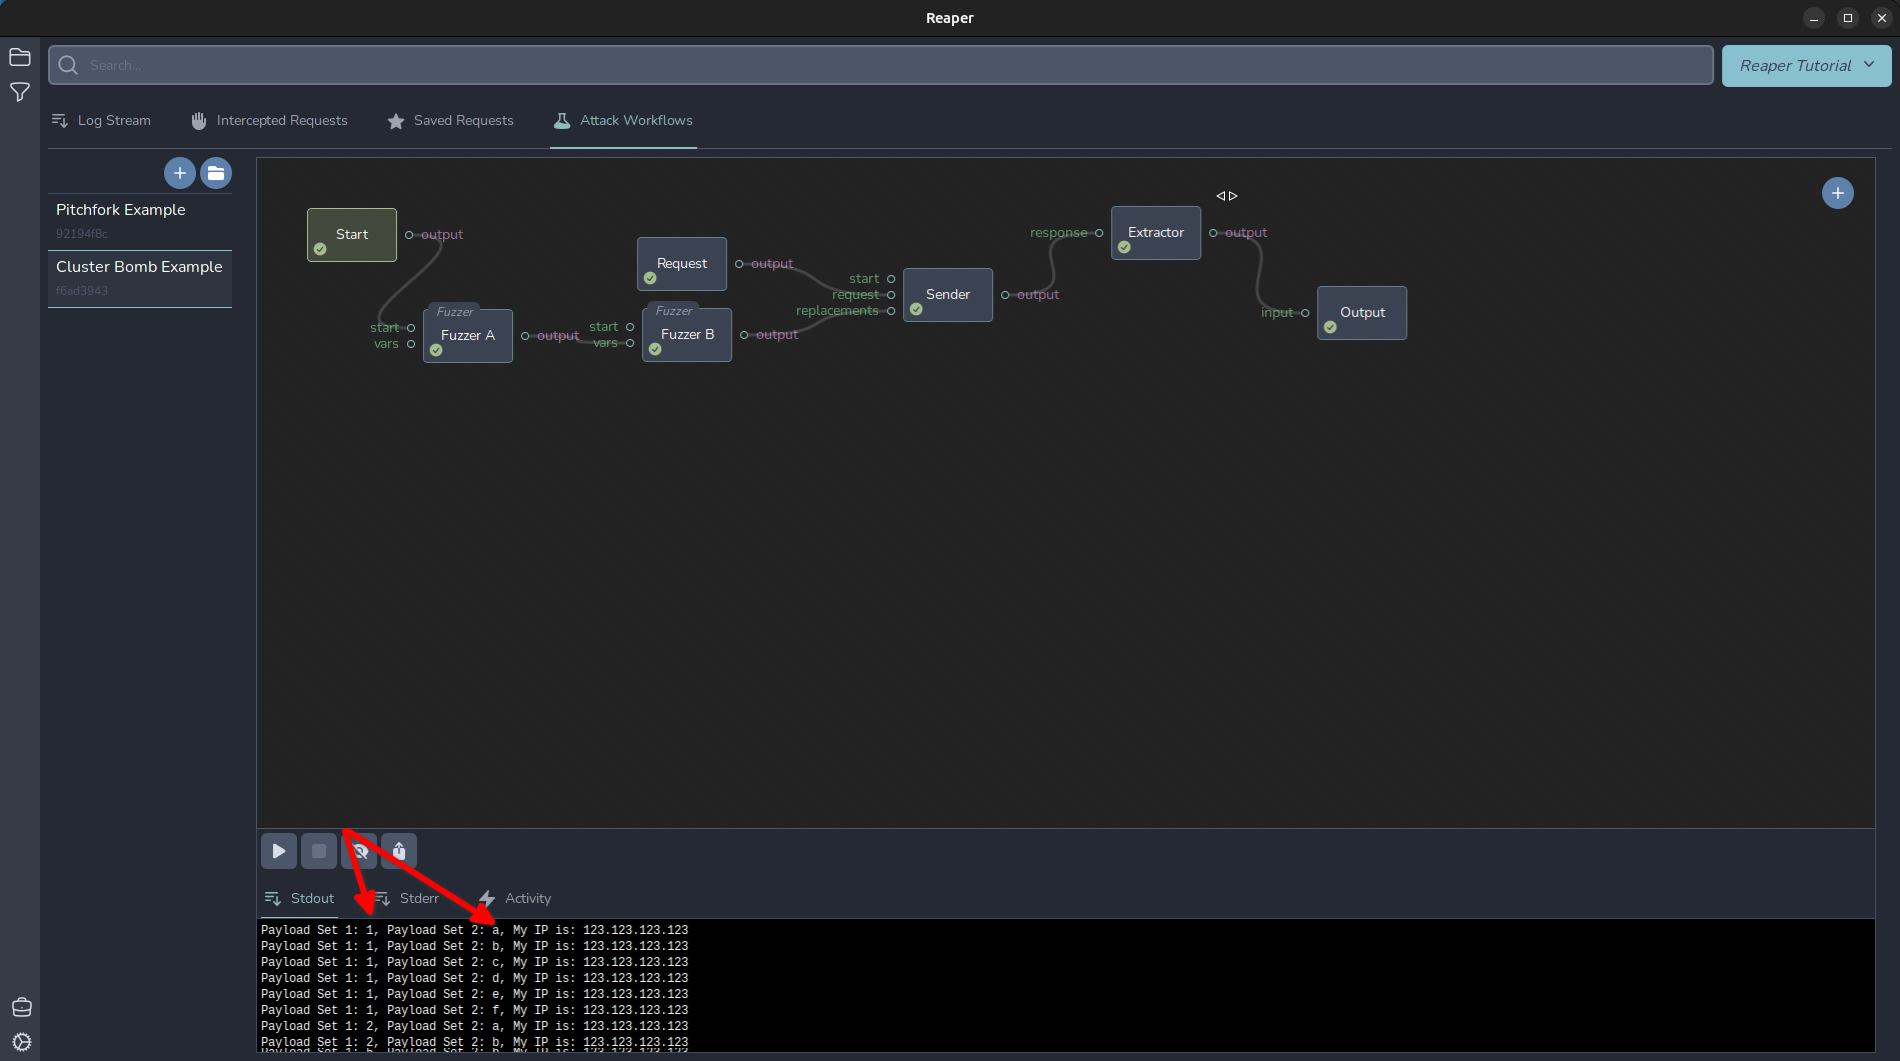
You can see from the output that it loops over each combination of each fuzzer, like a nested for loop.
I have attached the workflow below so you can import it to your Reaper instance to play around with.
f6ad3943-b31c-43c2-9281-f52b7913f76d.atk
Keep an eye out for more Reaper how-to guides!